3D printing - calculating cost and balancing value
3D printing is often the fastest and most cost-effective way to produce parts for prototyping and a growing range of end-use applications. Several factors determine the cost of 3D printing custom parts, including the materials required, production time per part and the type of printer you want to use.
In general, plastics are cheaper than metals, smaller parts use less material and simpler or less robust parts can be printed using more cost-efficient technologies.
If you’re choosing between the many 3D printing processes and materials available, you have to consider factors such as dimensional accuracy, surface finish and post-processing requirements. All of these factors will influence the final cost of your part.
Ultimately, fluctuations in material costs, among other supply chain elements, make it difficult to predict the price of 3D printed parts. This article covers the major factors impacting part pricing, while the Protolabs Network platform offers a fast and accurate way to estimate the cost of the parts you’re looking to build.
What affects the price of 3D printing?
There are many factors that will affect the final cost of 3D-printed parts. These are some of the most important factors:
-
Materials: Each 3D printing technology comes with its own host of polymer materials. Spools of filament for FDM (fused deposition modeling) tend to be relatively cheap, while SLA resin and SLS and MJF powders are, in general, more expensive. The amount of material required to print the part will directly affect the price—this is especially important when printing with FDM, which often requires support structures.
-
Part volume: Larger parts require more material and more space on the machine, and take longer to produce. These rises in materials and production time in turn raise the cost.
-
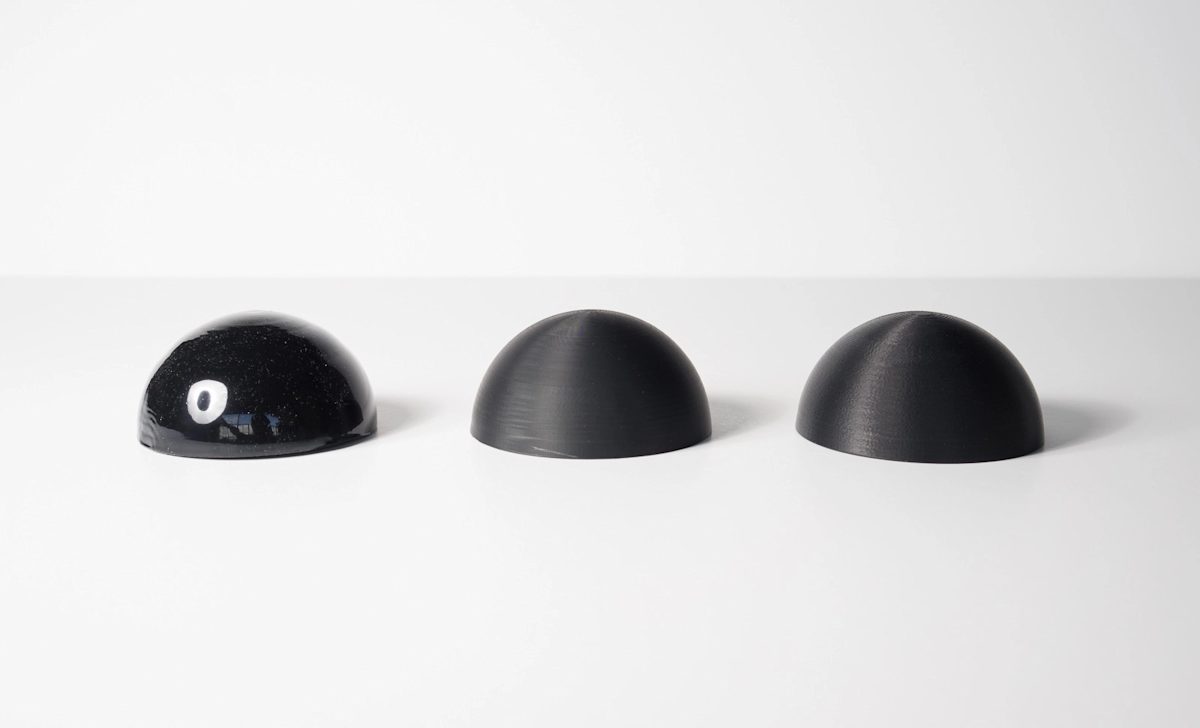
Post-processing: After you finish printing a part, there may be additional manual work required to complete the component. These finishing methods include support or powder removal, cleaning, sanding and other types of post-processing, all of which add to the final price of the part.
-
Equipment costs: These costs include installation and set-up time, running costs, periodic servicing for machines and more ad-hoc maintenance. You’ll likely incur these costs no matter what kinds of manufacturing technologies you’re using.
One of the principal factors keeping 3D printing an economical choice for many applications is the technology’s low set-up cost. This makes 3D printing optimal for smaller numbers of parts, though it becomes price competitive compared to CNC machining and injection molding when you have larger production runs.
3D printing costs can vary significantly depending on material, technology, part geometry, and production volume. Explore our online 3D printing service to upload your CAD files and receive an instant quote in minutes.
How much do 3D printing materials cost?
3D printing uses a huge variety of materials to build parts, and every unique 3D printing technology is compatible with different materials. In general, 3D printing metal parts is more costly than using polymers, though composites are usually more expensive than metals—other factors may present the reverse scenario in specific cases.
In this section, we’ll compare the costs of many common 3D printing materials. You can find a more detailed overview of material properties and pricing in our Materials Index.
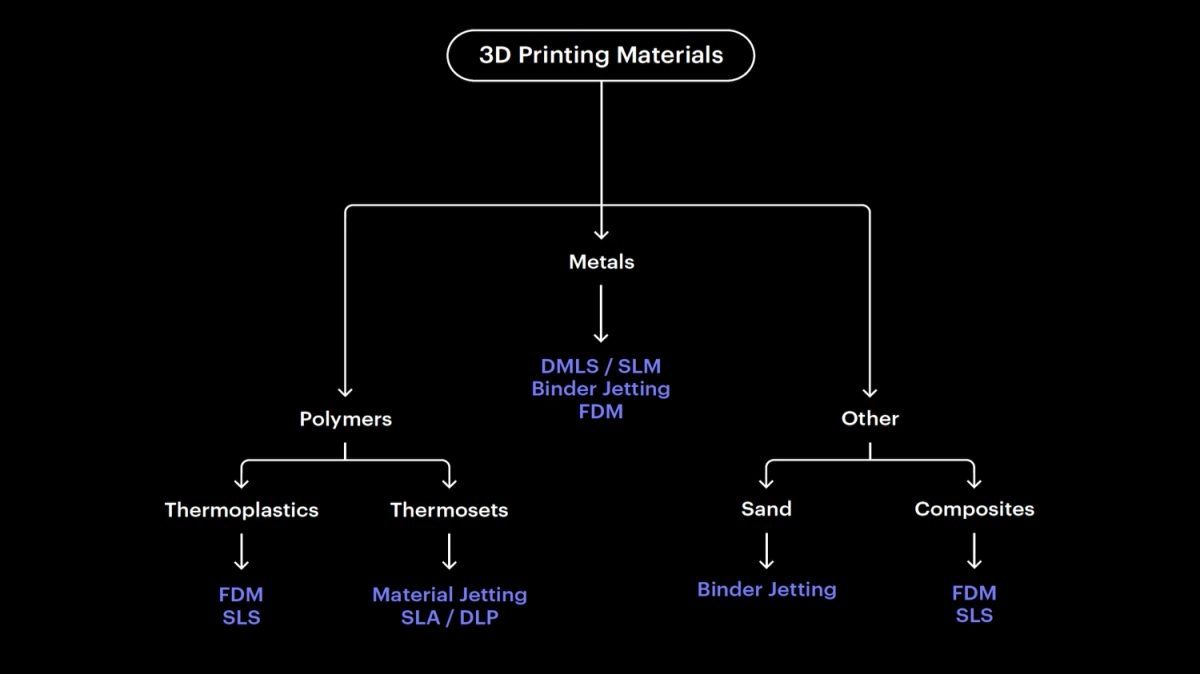
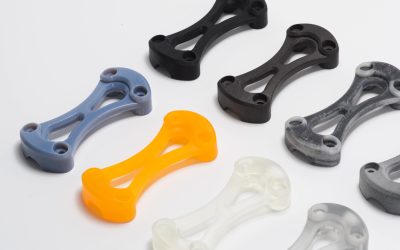
Plastics
You can divide 3D printing plastics into two categories: thermoplastics and thermosets. Thermoplastics react to heat and can be melted, making them the most common material for material extrusion processes. Thermoset polymer resins, on the other hand, are cured by UV light and are optimal for printing parts for prototyping.
| Material | Description | Cost comparison |
|---|---|---|
| PLA | High stiffness, good detail, affordable. | $ |
| Resin | High detail and smooth surface, injection mold-like prototyping. | $$ |
| ABS | Commodity plastic, improved mechanical and thermal properties compared to PLA. | $ |
| Nylon | Used to substitute functional injection molded parts, good chemical resistance. | $$ |
| PETG | Good for mechanical parts with high impact resistance and flexibility. Sterilizable. | $ |
| TPU | Rubber-like material, suitable for tubes, grips, seals, and gaskets. | $ |
| ASA | UV stability and high chemical resistance, preferred material for outdoor applications. | $$$ |
| PEI | Engineering plastic, high-performance applications, fire retardant. | $$$ |
| PC | Industrial thermoplastic with high accuracy, durability, and high strength. | $ |
| PEEK | Excellent mechanical properties, heat & wear resistant, good substitute for some metals for strength-to-weight ratio. | $$$ |
Metals
Stainless steel and aluminum are the most common metals for 3D printing, while titanium and copper alloys are ideal for more specialized applications. It’s important to note that while 3D printing with metal results in durable parts, the cost tends to be much higher than using polymer materials.
| Material | Description | Cost comparison |
|---|---|---|
| Stainless steel | High tensile strength, temperature and corrosion resistance. | $$$$$ |
| Aluminum | High machinability and ductility, good strength-to-weight ratio. | $$$$ |
Composites
Composite materials like carbon fiber, Kevlar and fiberglass strands are at the forefront of 3D printing innovation. They tend to have excellent strength-to-weight ratios and are often stronger than aluminum. Composites for 3D printing are common in industries such as aerospace, medical tech, renewables and high-performance automotive, where reducing weight is more important than cutting costs.
However, composite materials can cost upwards of 8 to 12 times as much as other plastics and 2 to 5 times as much as metals. Depending on the application, it’s possible to offset the higher cost of composites if you use a simpler design that requires less material to achieve the same structural integrity. You can also consider a hybrid approach, combining composites with metals and plastics for certain parts.
How much does each 3D printing process cost?
Every 3D printing process and technology has its own unique material and equipment costs. Let’s compare the main technologies we offer at Protolabs Network.
FDM (fused deposition modeling)
Prototyping FDM is the most cost-efficient 3D printing option for simple part geometries and smaller production runs. Out of all the processes on offer, FDM has the lowest base material cost, though as parts get more complex, you may need additional support structures, higher post-processing times and more human intervention. These factors all raise the cost of FDM.
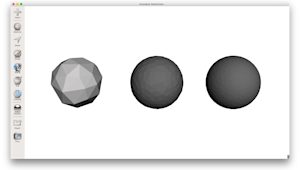
What’s unique about this process is that FDM machines, unlike other additive technologies, do not print solid objects. Instead, they use an internal grid structure to minimize material requirements. This infill is defined by a percentage. It’s common to print with an infill of 25%, though 50% and 75% both increase the relative strength of the object. Printing with 100% infill results in a completely solid object, which is rarer for FDM.
It’s important to note that we diffentiate between prototyping (desktop) FDM and industrial FDM. Industrial FDM utilizes high-end machines that can print industrial grade materials with high strength and high-temperature resistance. This form of FDM printing is far more expensive than it’s prototyping counterpart.
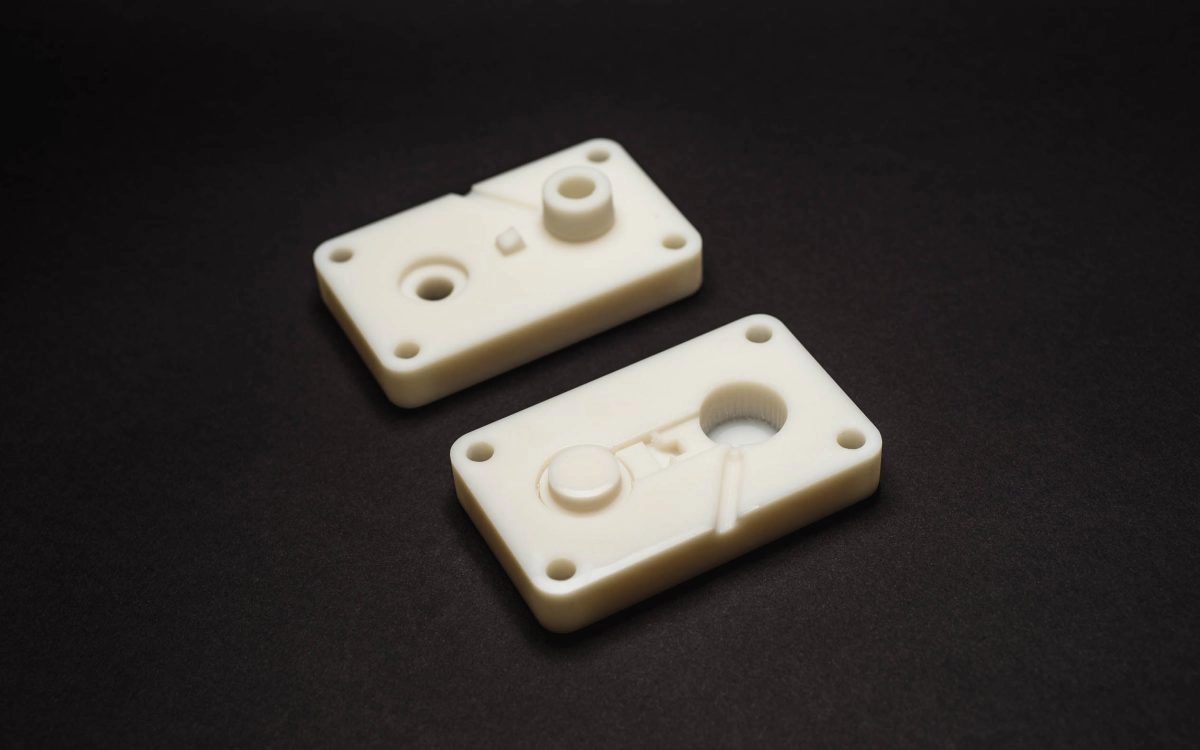
SLA (stereolithography)
Part of the vat photopolymerization family, SLA can produce more complex geometries and higher volume batches than FDM. For plastics, SLA has the highest overall material costs compared to other technologies, though post-processing costs far more manageable. SLA has the lowest part set-up time and, thanks to the great surface quality of SLA-printed parts, lower costs for post-processing.
SLA is available in its prototyping (desktop) and industrial applications, depending on your specific custom part requirements.
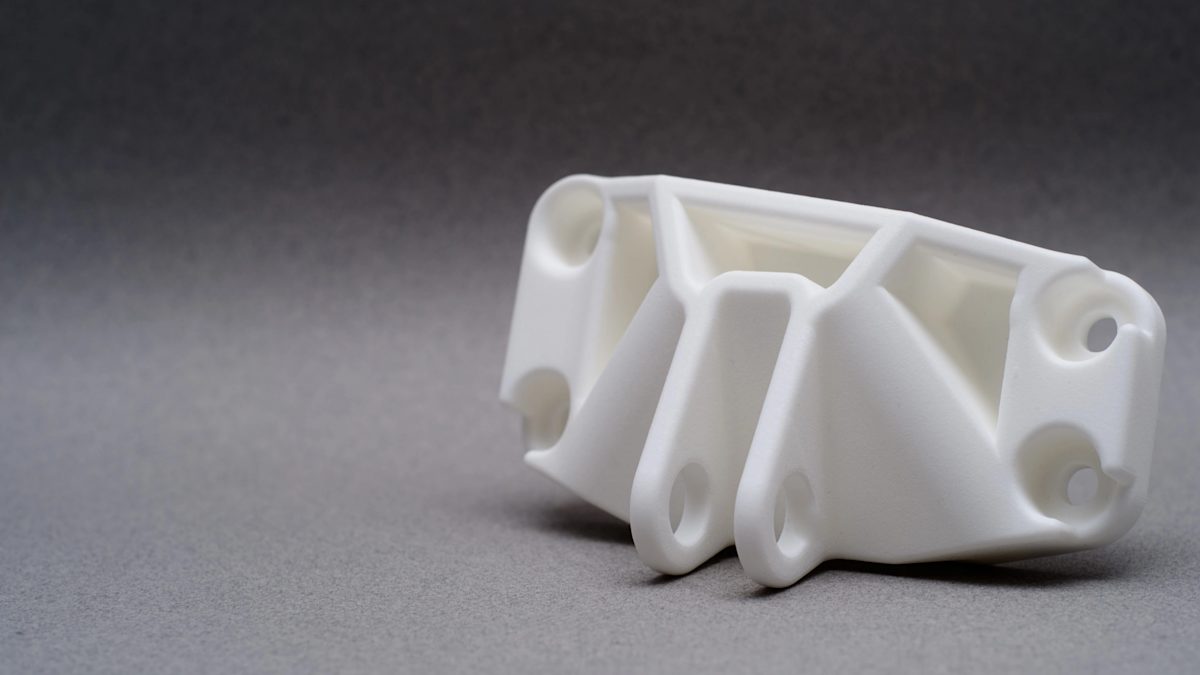
SLS (selective laser sintering)
The powder bed fusion technology SLS tends to have the lowest overall cost for complex part geometries, higher-volume batches and high-quality part finishes.
The base material costs for SLS are typically higher than other 3D printing processes, though you don’t need support structures. As well, you can reuse base materials, which minimizes waste. Both of these factors tend to reduce the overall material costs.
In terms of equipment costs, SLS involves longer set-up times and maintenance between batches for handling the powder materials. The lack of support structures also cuts down on post-processing, which in turn reduces cost.
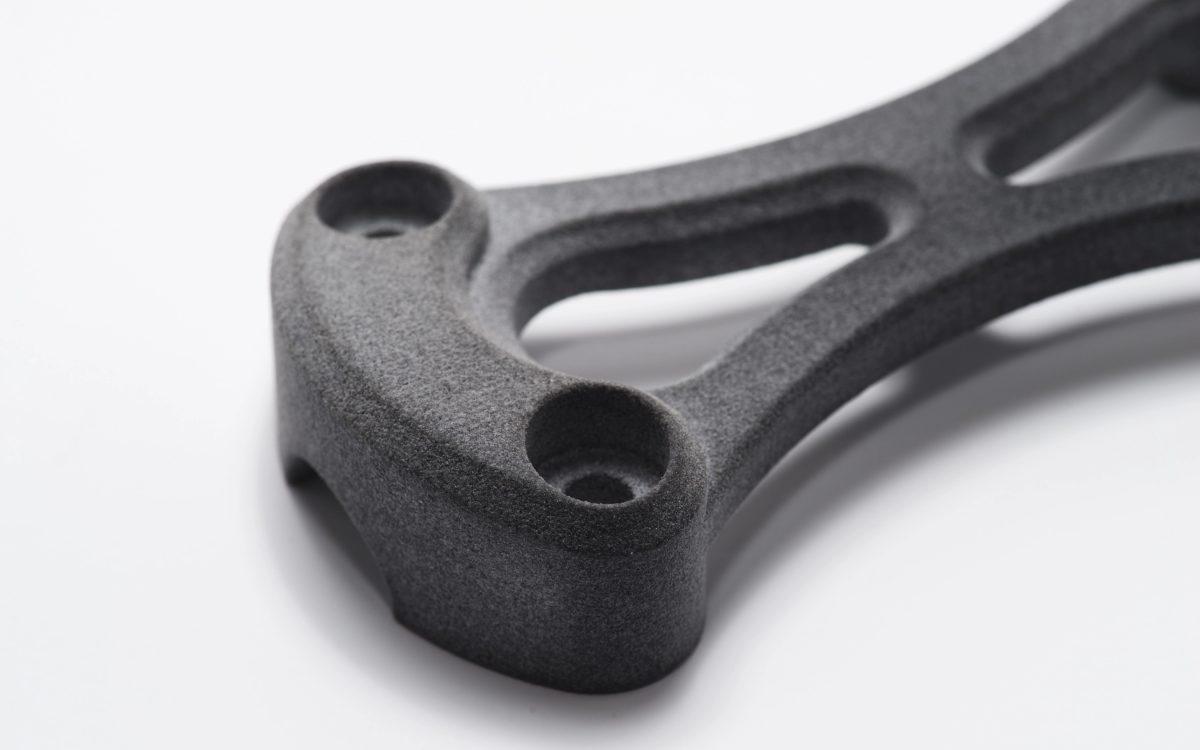
MJF (Multi Jet Fusion)
MJF, also a powder bed fusion technology, rivals SLS in terms of its lower cost for achieving impressive complexity and high-quality finishes. Printing with MJF also means you can reuse base materials and do away with the need for support structures.
Unlike SLS, however, MJF’s print speed is only dictated by the Z height of your part. The speed of an SLS machine has a linear relationship with material volume. Most MJF materials will end up costing more than other 3D printing polymers, but the fact you can continually reuse materials will save you money per part over the entire production run.
How does design affect 3D printing costs?
Design decisions have a direct impact on the overall cost of your custom part. During the design process, you should consider the amount of material you’d like to use, whether you’ll need support structures and what post-processing will be required.
Let’s go over the key design considerations that will affect the final cost of your custom parts.
Part volume
The total volume of your part will significantly affect how much it costs to print. Incremental reductions in part size can actually lower the cost quite a bit.
Support structures
Printing support structures requires extra materials, which quickly raises the cost of any 3D-printed component. It’s important to remember the additional price that comes with support structures when choosing the right manufacturing technology.
FDM, for instance, is generally the cheapest 3D printing process available, until you start producing complex parts that need support structures to print properly. SLS and MJF have a higher base cost than FDM, but as powder bed fusion technologies, you don’t need to think about the extra cost of support structures with these processes.
Part geometry
How you design the geometry of your part dictates the amount of material and support structures you’ll need when it comes time to 3D print the part. To reduce geometry costs, you can split the part model into several components, reduce the length or angle of overhangs and reorient the model on the printing base to minimize support structures.
Key design tips for 3D printing
Here are several essential design tips and tricks that will help to reduce the cost of 3D printing and ensure that your designs translate into pristine 3D-printed components.
-
Use gradual transitions between surfaces that border one another
-
Make sure you don’t have significant differences in the cross-section and volume of your part
-
Opt for rounder corners, as sharp corners can create residual stress on the workpiece
-
Avoid buckling or warping by removing thin, unsupported walls (especially if they are unnecessarily high)
-
Flatten out shallow angles on surfaces to avoid stair-stepping
-
Design for manufacturability analysis as early as possible
Avoid over-tolerancing your parts, as it leads to printing with thinner layers and extra secondary machining requirements
Does scaling down 3D models affect costs?
If producing your model to scale isn’t crucial—for example, if you’re producing a visual prototype—you can 3D print a smaller part or set of parts to significantly reduce your manufacturing costs.
It’s essential to remember that we’re thinking in three dimensions. A 10x10x10 cm cube has double the volume of an 8x8x8 cm cube, so even a small reduction in the size of your model can mean having to use far less material to produce a part that still serves the desired function.
One way to scale your 3D model is to use the free software Netfabb. Here’s how:
-
Step 1: Download and install the free version of Netfabb.
-
Step 2: Open your model, click on the “Scale Part” button in the menu bar and adjust the size of your model. The software uses the millimeter unit by default, but you can change this in settings.
-
Step 3: Save your scaled model by going to the upper left of the user interface and navigating from Part > Export Part > as STL (binary).
Step 4: Upload your design to Protolabs Network's platform for 3D printing. Remember to specify the same units as you used in Netfabb.
You can also watch this video on how to scale a 3D model in Netfabb.
Can I reduce my costs by hollowing out my 3D model?
Hollowing out your part in the design stage is an effective way to substantially reduce the costs of 3D printing.
While FDM printers produce semi-hollow parts with an internal infill structure by default, other 3D printing technologies like SLA, SLS and MJF may produce parts that are 100% solid unless the original model is already hollow. If your part doesn’t have to be solid throughout, we recommend hollowing out your 3D CAD model.
Of course, this recommendation only applies to powder-based technologies and comes with the extra design tip to add escape holes so unfused materials can be removed after printing. If you hollow out your design for SLA, it may be challenging to remove resin when the part is complete.
Here is a step-by-step guide to hollowing your model using the free Meshmixer software.
-
Step 1: Download and install Meshmixer.
-
Step 2: Open your model and click Edit > Hollow and select your wall thickness. Use 2 mm-thick walls as a safe lower limit for all 3D printing processes.
-
Step 3: Add escape holes to your model so you can remove excess material after printing. Double-click the surface of your model in Meshmixer to add these. We recommend adding escape holes in places that aren’t normally visible in the use of your part. If you’re printing with SLS, make sure to add 2 or more holes with a diameter of at least 5 mm.
-
Step 4: Click Accept and export your model as an STL file.
You can also watch this video on how to hollow out your model using Meshmixer. As you will see, a few minutes of editing a CAD file may significantly impact the final cost of 3D printing custom parts.
How do you eliminate the need for support structures?
FDM 3D printing often requires support structures to print parts with overhangs. This leads to more materials and additional post-processing to remove the support structures and smooth out the surface of the part. Eliminating the need for
support structures is a viable way to reduce the cost of FDM.
We recommend two options for eliminating the need for support structures in your FDM design.
Overhang angles
The first option is to design your part with overhang angles greater than 45 degrees.
To dive deeper into support structures in FDM and other 3D printing methods, check out this article. You can also find our complete design guidelines for FDM here.
Splitting your model
The second option is to split your model into two or more parts that don’t require support structures. You can assemble these pieces after 3D printing is complete.
Here is a short tutorial on how to do this in Netfabb:
-
Step 1: Download and install the free version of Netfabb.
-
Step 2: Open your model in Netfabb. Select the “Cuts” field and specify the location and angle where you want to split the part. Make sure each component has a flat surface to be used as a base for printing.
-
Step 3: When you’re happy with the placement, click on “Execute Cut” and export your file to STL.
You can also watch this video on how to split your model for FDM in Netfabb.
What’s the value of 3D printing?
While there are many extra costs to watch out for throughout the 3D printing process, overall the value you get with this additive manufacturing technology far outweighs an unexpectedly high price tag.
3D printing has the incredible potential to reduce your part count, produce parts that are lighter and more structurally sound and lower the cost of assembly. Using 3D printing to manufacture parts means gaining access to part features that are either impossible or much more challenging to achieve with traditional methods.
As well, it’s vital to remember that 3D printing doesn’t involve fixtures, molds and different types of tooling. This balances out those extra costs you’ve seen so far. What’s most important is to consider the overall value you get with 3D printing, which is incredibly impressive for a growing list of applications and industries. A few extra costs associated with 3D printing now may reduce manufacturing costs in the long run, and leave you with more design freedom and better parts.
Frequently asked questions
How expensive is 3D printing?
3D printing is generally cheaper than other manufacturing technologies for rapid prototyping and certain end-use production applications. FDM is the most cost-effective option, unless you need a lot of support structures, while SLS and MJF offer the best value for a wide range of uses.
How can you reduce 3D printing costs?
There are many ways to reduce your 3D printing costs, especially in the design phase. Effective ways to lower the price of 3D printing include hollowing out your model, splitting it to avoid unnecessary support structure, scaling it down for prototyping purposes and avoiding overhangs.
What affects the cost of 3D printing?
Many factors influence the final cost of 3D printing parts. The size of your model, how much material you need to use, which technology you choose to manufacture your parts, whether you need support structures and post-processing and finishing and many other elements are among the important things to consider.
How can I calculate 3D printing costs?
Much of the information on process and material costs are easily available on Protolabs Network's site and across the web, but the easiest way to calculate your 3D printing costs is to head to our quote builder to test different iterations of your CAD model.
How much does a 3D printer cost?
There are many different types of 3D printers for desktop, prototyping and more industrial applications. Most hobbyist machines will cost between €300 to €500, while professional 3D printers vary in price between €1,500 to €20,000. 3D printers designed for enterprise and industrial use can cost nearly €100,000.
Is 3D printing more expensive than injection molding?
While 3D printing tends to be cost-effective in many cases, injection molding will cost less if you’re producing more than 100 or so parts. The more pieces you manufacture per mold, the better value you’ll get for injection molding. However, SLS and MJF are starting to give injection molding a run for its money where overall value is concerned, especially as powder based fusion techniques don’t involve tooling.
Is 3D printing more expensive than CNC machining?
The answer to this question largely depends on whether you’re manufacturing for prototyping or end part purposes. 3D printing is on average cheaper than CNC machining, especially in low volumes, though once you start requiring runs of over 100 parts, CNC may start looking like the more cost-efficient technology.
Is 3D printing faster than traditional manufacturing?
Absolutely. 3D printing is a digital manufacturing technology, meaning lead times and DFM checks are both significantly quicker.