What is stress in mechanical engineering?
In mechanical terms, stress is the internal resistance of a material to an external force, represented as force per unit area (e.g., MPa or psi). In engineering, there are three main types of stress:
-
Tensile stress occurs when a material is stretched.
-
Compressive stress happens when a material is squeezed or compacted under a load.
-
Shear stress develops when forces slide past each other in opposite, parallel directions.
Understanding the different kinds of strain can help you choose materials that are able to handle the types of pressure they’ll encounter.
How material stress is measured
Stress is most commonly measured through tensile testing, where a sample is stretched until failure to show the maximum stress capacity, but there are a variety of different tests that can determine a material’s stress limits.
Tensile testing: A sample material (often a standardized ‘dog-bone’ shape) is placed in a tensile testing machine, which applies a pulling force along its length until the material breaks. This measures tensile stress, yield strength, and ultimate strength, used for metals, polymers, and composites in high-stress applications.
Compression testing: The material sample is placed between two compression plates, which press inward to squeeze the material until it deforms or breaks. This is used to check compressive stress and yield strength, often used for load-bearing materials like concrete and ceramics.
Shear testing: Applies opposing forces to evaluate shear strength, and is often used to make sure that adhesives, bolts, and joints can withstand lateral forces, which comes up often in construction and automotive applications.
Flexural testing: The material sample, often in a bar shape, is supported on two ends and loaded in the center so that it bends until it breaks. This is used for materials like plastics and composites in structural supports.
If you want to find out more about tensile testing, check outProtolabs’ blog on tensile testing for 3D printing materials.
What is strain in mechanical engineering?
Strain shows how much a material stretches or compresses when under stress, calculated as the change in length compared to its original size. Strain comes in two main types:
-
Elastic strain is a temporary stretch or compression that bounces back when the stress is removed.
-
Plastic strain is a permanent change that remains after the material reaches its breaking point.
How material strain is measured
Strain is measured with tools like extensometers or strain gauges during tensile tests, helping engineers see if a material can hold its shape under pressure. Here are a few different ways engineers can test the strain of a material.
Tensile testing with extensometers: The material is stretched until it breaks, while an extensometer measures how much it lengthens. This shows how much strain it can handle before failure.
Compression testing with strain gauges: The material is squeezed, and strain gauges measure how much it shortens under pressure. This test helps assess materials that need to withstand high compressive forces.
Bending or flexural testing with deflection measurement: The sample is supported at both ends and pushed down in the center. By measuring how much it bends, engineers can see how it handles strain in bending.
Thermal strain testing: The material goes through temperature changes, and any expansion or contraction is measured. This is key for materials used in high-heat environments, like electronics and aerospace.
Creep testing: The material faces a steady load over time, with strain measurements taken periodically to track gradual stretching. This test is most relevant for materials in constant, high-temperature environments, like turbine blades or structural supports.
What is the relationship between stress and strain?
Stress and strain are two sides of the same coin when it comes to understanding material behavior under load. Stress is all about the force being applied—like how much weight is pressing down or pulling on a material. Strain, on the other hand, is the material's response—how much it stretches, compresses, or deforms as a result.
In the elastic region (where stress and strain are proportional), the material can spring back to its original shape once the stress is removed. This is where Hooke’s Law comes in, which basically says, ‘the more you pull, the more it stretches,’ but only up to a point.
When stress goes beyond that limit—known as the yield point—the material enters the plastic region. Here, the changes are permanent and the material won’t go back to its original shape, even if the force is removed. The highest point it can reach before breaking is called ‘the ultimate tensile strength’. So, stress is the driving force, while strain is the effect—together, they show how a material holds up under pressure.

The stress-strain curve
The stress-strain curve visually displays how a material behaves under load. Refer to this diagram courtesy of ADMET Materials Testing System Manufacturer.
Here’s an example for aluminum:
-
Elastic region: The initial linear part, where stress and strain are proportional, and the material returns to its original shape.
-
Yield point: The transition where aluminum begins permanent, or plastic, deformation.
-
Ultimate tensile strength: The peak stress point before the material starts to fracture.
-
Fracture: The point where the material ultimately breaks under stress
Stress vs. strain differences by material
Not all materials handle stress and strain the same way. Depending on their properties, materials like metals, plastics, composites, and ceramics react differently under load, making each suited to specific applications.
Metals: Both titanium and aluminum have distinct yield points and solid mechanical properties. When engineers decide between titanium vs. aluminum, they must consider both stress and strain. Aluminum has an excellent weight-to-strength ratio and is more elastic, but it doesn’t handle fatigue as well as titanium. This means aluminum may wear out faster in high-stress, repetitive-use applications, where titanium’s fatigue resistance holds strong.
Plastics: How plastics respond to stress and strain all depends on the type. Thermoplastics can stretch and snap back, making them great for applications that require some give. Thermosets, on the other hand, are more brittle and don’t handle strain as well, so they’re the better choice when strength is more important than flexibility.
Composites: With composites, it’s all about fiber direction. They’re strongest along the fiber alignment, making them ideal for high-stress, directional loads. The stress and strain properties change significantly depending on the direction, so they’re perfect for applications that need strength in specific areas, like the prosthetic feet developed by Fillauer Composites.
Stress and strain by manufacturing technology
Different manufacturing methods introduce distinct stress and strain characteristics in materials. Here’s a look at how common manufacturing processes influence material behavior under load.
3D printing: In 3D printing, parts are built layer by layer, which gives them anisotropic properties—meaning their stress and strain responses can vary depending on the direction of the force. For example, parts might be stronger along the layer lines than across them, impacting their durability and performance over time.
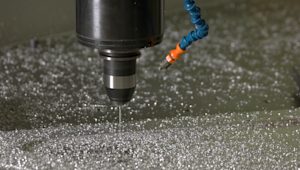
CNC machining: CNC machining applies cutting forces that create residual stress in the material, which can influence its fatigue life. In some cases, machining also hardens the material’s surface, making it tougher but potentially less flexible for any future shaping or processing.
Injection molding: Injection-molded parts are shaped under high pressure and cool quickly, which can cause stress due to uneven cooling and shrinkage. This can compromise the part’s dimensional accuracy and strength, especially in large or complex shapes.
Sheet metal fabrication: When you bend or stamp sheet metal, it tends to harden and lose some flexibility—this is called strain hardening. It can impact how well the metal holds up over time, especially under repeated stress. In addition, the way the metal’s internal grain lines up actually makes a big difference in how it handles stress.
Material stress and strain by industry
Different industries rely on stress-strain data to make sure their materials and designs meet the application demands, especially when manufacturing for production runs. Here’s a look at how stress and strain come into play across a few key sectors.
-
Aerospace: Aerospace parts, like wings and fuselages, face high tensile and shear stresses, while they also need to be lightweight yet resilient. You need materials with a good balance of strength and weight to withstand these extreme conditions.
-
Automotive: In the automotive industry, engineers have to design parts that handle fatigue loads—the repeated forces car parts experience while driving. Components like chassis and axles need to absorb these loads without failing over time.
-
Medical devices: Medical devices must be able to handle tensile and compressive stresses to remain safe and effective in critical applications.
Where to learn more about selecting materials
Selecting materials requires a thorough understanding of stress-strain properties and how they affect performance. Check out these resources on material selection compiled to help engineers choose the right material for their project parameters.
Get a quote
For custom parts designed with precise stress and strain parameters, upload your file now and get a free, instant quote.
Frequently asked questions
What’s the difference between stress and strain?
Stress is force per unit area, while strain measures the deformation response.
How is stress-strain data used in design?
Engineers use this data to set load limits and select materials for specific applications.
Do different materials have unique stress-strain responses?
Yes, metals, polymers, composites, and ceramics each have distinct stress-strain behaviors.


