Hubs is now Protolabs Network. Find out more

Get instant quote

What are the optimal shell and infill parameters for FDM 3D printing?

How do shell and infill properties impact the performance and cost of FDM 3D printing? It turns out these parameters have more of an effect than you may realize, so learning to optimize these features will improve the performance of your FDM custom parts while reducing manufacturing costs.

Selecting the optimal shell and infill parameters for FDM 3D Printing

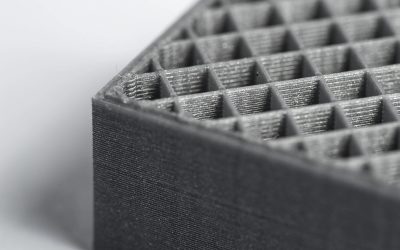
The majority of FDM 3D-printed parts are not printed solid. Printing solid parts requires high amounts of material and longer print times, resulting in high costs. To optimize the printing process most parts are printed with solid shells and filled with infill. Shells and infill play an important role on the quality, appearance and function of FDM printed parts.

This article will discuss the difference between shells and infill and how shells and infill can be employed to optimize a design. To level up your design skills for 3D printing, check out this comprehensive one-pager with all of Protolabs Network's top design rules.

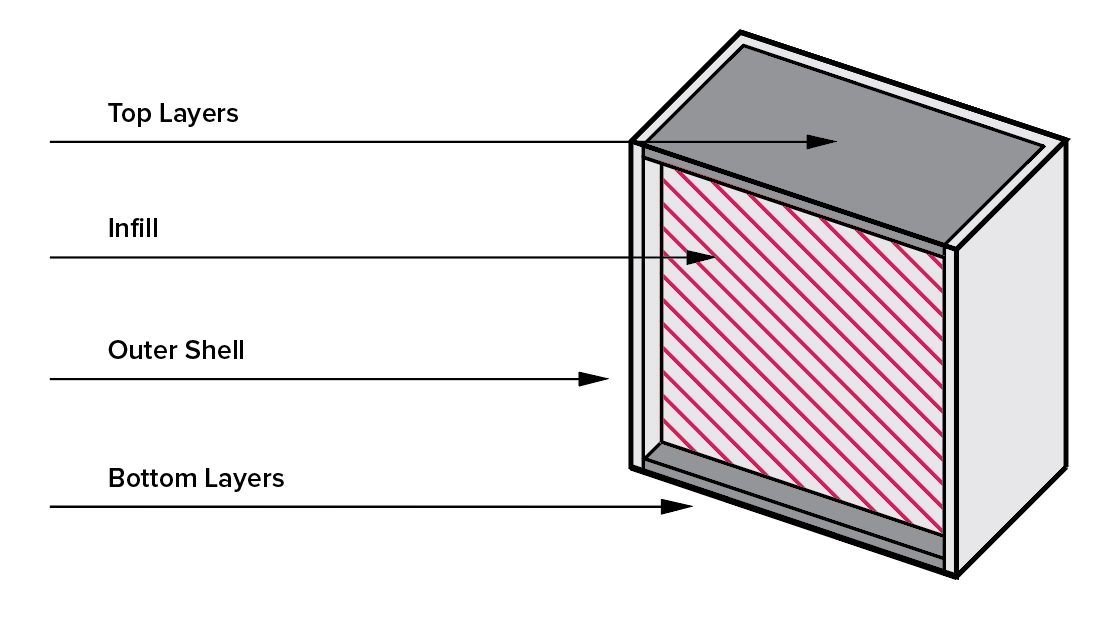
What are the major components of an FDM 3D print?

A standard FDM print can be broken down into 4 sections: shells, bottom layers, top layers and infill.

  1. Shells: The walls of the print that are exposed to the outside of the model

  2. Bottom layers (a type of shell): The part of the print that is exposed to the outside of the model, facing the build plate

  3. Top layers (a type of shell): The parts of the print that is exposed to the outside of the model, facing upwards, towards the nozzle. Typically this surface will have the best surface finish

  4. Infill: The internal structure of the print

The parameters of these sections can each be altered to optimize a design.

These are the four sections of an FDM print that designers can alter if need be.

What are shells in FDM 3D printing?

Shells are the number of layers on the outside of a print. For FDM printing,  shells are always the first areas to be printed per layer. Let’s unpack several key design considerations for optimizing shells. 

  • Strength can be added by increasing the shell thickness. This allows for a slightly more robust print without having to increase the amount of material used for infill. Most slicer programs allow shell thickness to be adjusted even allowing areas of high stress to be customized with a high shell density offering localized areas of high strength.

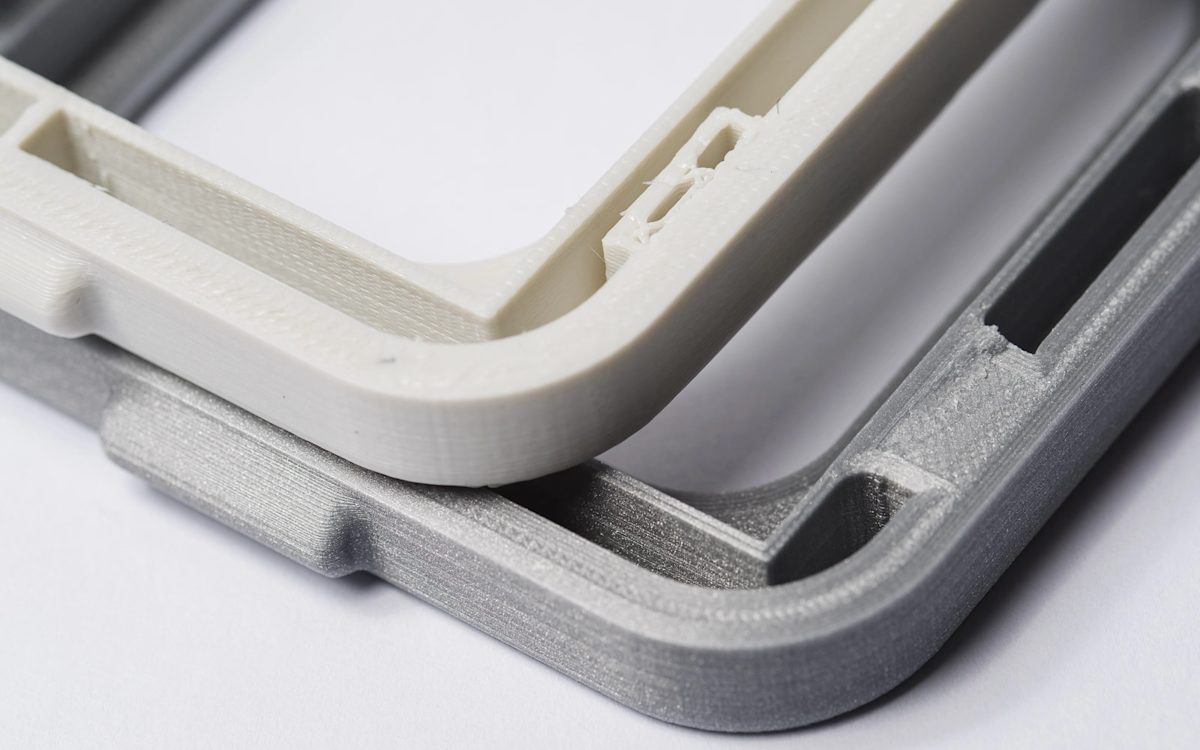
  • If you plan on finishing a print by using sanding or chemical smoothing, increasing shell thickness is often necessary. This is because post-processing methods reduce the thickness of the surface of the model.

  • Any increase in the number of shells also increases the amount of time and material required to print the model. This will augment the overall cost of your custom parts. 

Shells typically consist of a specified number of nozzle diameters. It’s always good to design shells with multiple nozzle diameters to prevent forming voids in the print. Most shells are printed with a thickness of 2 nozzle diameters (usually this corresponds to 0.8 mm).

Designing walls with multiple nozzle diameters eliminate spacing in wall features, which makes your custom parts stronger.

What is infill for FDM 3D printing?

Objects printed with prototyping FDM technology are rarely completely solid. Typically, the inside of an FDM print is composed of infill, which have varying structures and shapes that can affect the print time, weight, strength and flexibility of 3D-printed components. 

By default, most FDM slicer programs will produce parts with 18% to 20% infill, which is perfectly adequate for most 3D printing applications (using FDM). This infill percentage generally allows for faster and more affordable print runs. 

Infill percentage

The strength of a design is directly related to a 3D-printed part’s infill percentage. A part with 50% infill compared to 25% is typically 25% stronger while a shift from 50% to 75% increases part strength by around 10%.

FDM prints with different infill density
Infill percentages for FDM 3D printing can range from 18% and 20% (left) to 50% (middle) and 75% (right).

Understanding the application of a final printed part allows a designer to specify the optimal infill percentage. A prototype where the form is important can be printed with very low infill, which results in significant cost and time savings, whereas a bracket that will experience loading will need a higher infill percentage. 

As mentioned above, the standard 18% to 20% that most FDM printers use as a default should be acceptable for most applications, though feel free to speak with a Protolabs Network engineer for other potentially more robust infill options.

Feature strength

Infill also plays a critical role in how extended/protruding features are connected to a model. Snap-fit connections are a good example of this. The base of a snap-fit connection is often a weak point.

With a low infill density (20%), the cantilever is much more likely to break as the short extruded clip is only connected to the body of the print by a small cross-sectional area. Increasing the infill percentage means that more of the body of the print is connected to the cantilever, thereby increasing the strength of this connection.

Inspect these two broken snap-fit connectors. The white one has 20% infill and the grey one has 100% infill. The higher infill percentage results in a much stronger connection to the body of the print.

Screwing, tapping or bolting

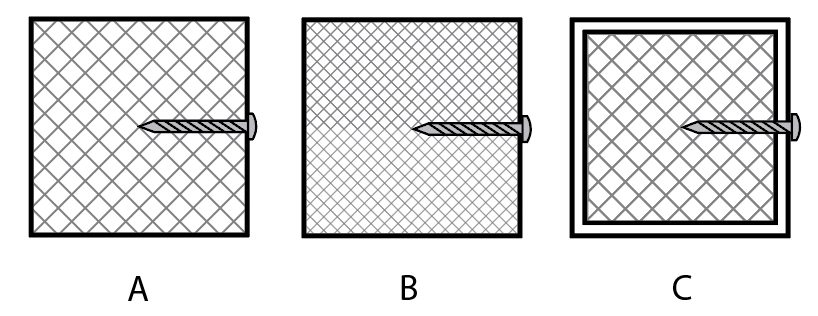
An important factor to remember when choosing the infill percentage of your 3D-printed parts is whether you’ll need to drill holes or place screws into the component. 

Consider a print with low infill that is going to be drilled and then screwed to another surface. Often the drill holes will go through the top and bottom layers of the print and miss the infill of the model, creating a very weak connection. For these applications, a higher infill is desirable (50% minimum).

Connections that utilize clearance holes and bolts are better suited to parts with a low infill percentage. The shells, walls, and infill offer good compressive strength providing better anchoring of the part.
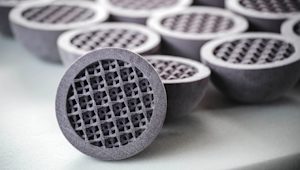
Compare these three illustrations. A represents poor anchoring for a screw. B shows that increased infill allows for better anchoring. C shows that increasing the outer shell is a cheaper solution and offers improved anchoring.

Infill geometry

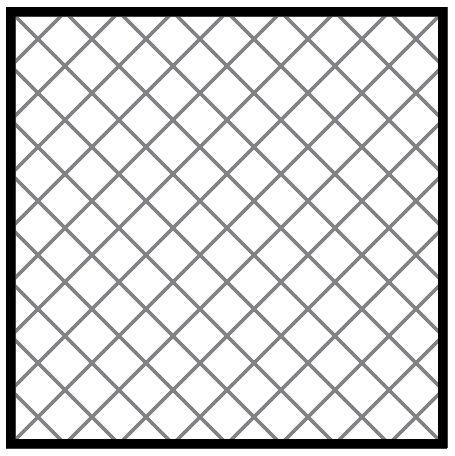
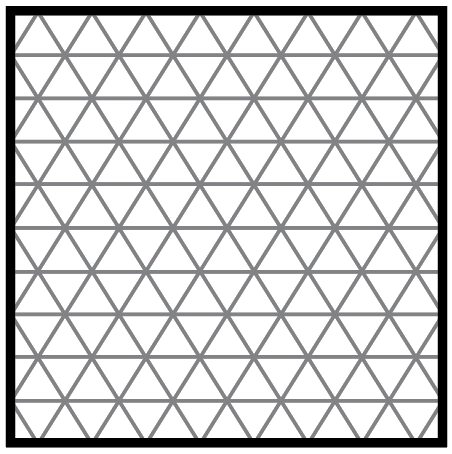
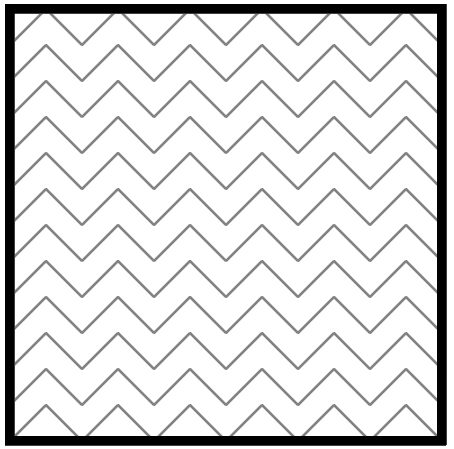
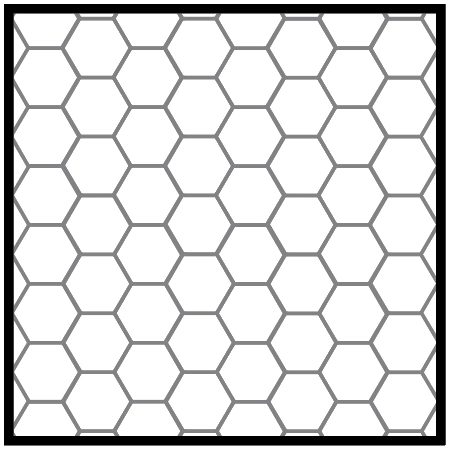
For a standard FDM print, the machine will add the infill structure as an angled hatch or a honeycomb shape. Let's look at the four most common infill geometries and their optimal uses.

Rectangular - This is the standard infill pattern for FDM 3D prints. It's strong in all directions and is reasonably fast to print, and requires the printer to do the least amount of bridging across the infill pattern.

Triangular or diagonal - This geometry is used when strength is needed in the direction of the walls. Triangles take a little longer to print.

Wiggle - This geometry allows the model to twist or compress, as well as be softer. It can be a good choice, particularly with a soft rubbery material or softer nylon.

Honeycomb - This is one of the more popular infills. It's quick to print and is very strong, providing strength in all directions.


New to 3D printing or need a comprehensive refresher?

Get our guide to 3D printing

What are the best practices for setting shell and infill parameters?

Designing parts for FDM 3D printing involves a lot of steps, and it's easy to forget certain factors and features. Choosing the right infill percentages and geometries, and optimizing the use of shells, will definitely improve how your custom parts turn out.

  • Remember to take into account the application of the parts you're sourcing. This will affect the shell thickness and infill percentage you need to set. Increases in shell thickness and infill percentages lead to higher strength but also longer print times and augmented costs.

  • Design shells with multiple nozzle diameters.

  • If you need to place screws in a part, increase the shell thickness or infill percentage to improve anchoring. If this isn't feasible (or possible), consider using clearance holes and bolting with washers.

  • For cheaper rapid prints, rectangular infill is optimal thanks to its swifter print speed. Honeycomb or triangular infills boost part strength compared to rectangular geometries, so use either of these two if higher strength is critical to your part's functionality.

CNC machining, 3D printing and sheet metal fabrication parts
 

More resources for engineers

What is GD&T? How to reduce manufacturing errors and improve quality

What is Geometric Dimensioning and Tolerancing (GD&T) and how is it used? This article explores the basics of how and when to use GD&T to get the best results out of custom part manufacturing.

Read article

How do you design parts for MJF (Multi Jet Fusion) 3D printing?

Multi Jet Fusion (MJF) 3D printing can create highly accurate, complex industrial parts more efficiently - and potentially more cost-effectively - than other industrial 3D printing processes. This article covers how to design parts for MJF, common applications of the technology and key best practices.

Read article

What is design for manufacturability (DFM)?

Design for manufacturing (DFM) means taking a design-first approach to manufacturing. In this article, we look at the overall DFM process, the necessary steps for a successful outcome, examples of DFM done right and how to get the most out of your own processes.

Read article
3D Printing STL files: A step-by-step guide

3D printing STL files: A step-by-step guide

Learn how to avoid low quality 3D prints or unnecessarily large files by exporting your STL file in the correct resolution.

Read article
SLA 3D Printing materials compared

What’s the right resin for SLA? 3D printing materials compared

What are the different materials available for SLA 3D printing? This article compares the main printing resins, including standard, tough, durable, heat resistant, rubber-like, dental and castable, by material properties. Find the best material option for your application.

Read article
How to design parts for Binder Jetting 3D printing

How to design parts for binder jetting 3D printing

A comprehensive guide on designing parts for Binder Jetting, covering the printing process, design specifications and material options.

Read article
Aerospace 3D printing Applications

3D printing for aerospace and aviation

How does 3D printing accelerate innovation in the aerospace and aviation industry? In this article, we explain how 3D printing and additive manufacturing are commonly used in aerospace and how they improve prototyping and end-use part production for these industries.

Read article
Understand and fix common STL file errors

What are the top STL file errors? Here's how to fix them

What are the most common STL file errors and how will they affect your ability to export models for 3D printing? Learn to identify the errors you may encounter when working with STL files and how to fix them so they don't delay your next 3D printing run.

Read article
3D Modeling CAD Software

What is CAD modeling? Comparing design software for 3D printing

What is CAD modeling and why is it an essential tool for digital manufacturing? Explore the types of CAD software available for bringing ideas into the physical world via digital 3D modeling. Find the right software tools for your application.

Read article
How to design parts for Material Jetting 3D Printing

How to design parts for material jetting 3D printing

This article explains how to design Material Jetting 3D printed parts including technical design specifications, materials, limitations and an introduction into the post-processing options available.

Read article
How to design parts for Metal 3D printing

How to design parts for metal 3D printing

A comprehensive guide for metal 3D printing covering the printing process, design specifications, material options and technology limitations.

Read article
Jewelry 3D Printing Applications

Jewelry 3D printing applications

This article discusses how 3D printing is being used to produce high detail, custom jewelry through investment casting and direct metal printing.

Read article

Show more

Show less

Ready to transform your CAD file into a custom part? Upload your designs for a free, instant quote.

Get an instant quote