Hi

It’s been a couple weeks I am trying to find out what would be the perfect Material for my project:

It’s an car audio project, I would like to duplicate the Dash Bezel of my car.

Thereis 2 parts:

- Front: The one facing you when you drive, need to be solid and slightly flexible, ABS should be ok for that I guess (stuff like that:)

- Back: The part snapping into the car, this one need to be really flexible but really strong and rigid at the same time
I have a video to show you:

So if you could help me to find out how to do it, and if you think it’s doable via 3d printing, I have already all the design done via Autodesk Invetor (took me 3 weeks)

Thanks guys

5 Likes

I would look towards Polyester, like Colorfabb XT or PET (which is a special kind of Polyester). In case of PET you might be interested in Taulman T-Glase. An alternative to PET would be PMMA*, which is fairly rare, but web shops, like e3d-online.com offer it.

*PMMA is also known as Acrylglass or Plexiglass, it’s used in all kinds of windows and glasses, it’s a little bit weaker and more flexible compared to Polycarbonate (PC).

PLA or PLA compounds will be too stiff and have a too low melt point for usage in a car.

Anything with carbon fibres is too stiff.

Nylon might work too, but you should keep the object fairly dry, as Nylon can take up up to 25% of it’s own weight in water. The water uptake weakens Nylon.

I haven’t yet had much experience with PC-ABS, but I think, that it will be too stiff, normal ABS might be better.

If you have the sample shown in the video, you could try to find a small text on the plastic, usually letters like “PP” or “PE” or similar indicate the material. In the cases named above it’s “PP” => Polypropylene and “PE” => Polyethylene.

Materials that are specially named as flexible will most likely be too flexible and elastic (for example Ninjaflex).

Anyways print the objects with fairly low infill and a thin outer shell, not more then 1mm. The less material you use for printing, the more flexible the final part will be.

You should brush on some acetone on the ABS prints (with a normal paint brush). Acetone dissolves ABS, but if you apply just a bit of acetone it will “melt/fuse” the different layers together. That will give you a lot stronger prints, otherwise the print will break fairly quickly between the layers.

Should the whole print be flexible, or just some specific spots ? If you just need “local flexibility” you could try to print a flexible material and a rigid one at the same time with dual extrusion, Ninjaflex + ABS or Semiflex + ABS are very common and bond together very well.

Cheers,

Marius

2 Likes

A very nice project I must say! Marius describes everything perfectly. I would definitely try out ABS at least for the prototype of the first part. And I am not really sure how to get a part like the second one. I am sure someone has made something like this. Nevertheless, from the description semi-flex material could be a great test for the second part!

Please let us know how it goes!

Hi Marius,

First of all, Thanks you very much for this explanation

1 - I checked like you asked for the part in the video (the flexible black one), and it says PC/ABS

The most important thing for this part is that it has multiple SnapFits, and it would need to avoid breaking when installed (and removed) from the car. I dont know if ABS can handle that correctly, what do you think ?

2 - The other part (The front bezel) doesnt have any indication on it. The most important part is that it has to be solid, easy to polish and finish and custom paint. Probably also resist to heat as a car could be very hot during the summer. So ABS maybe the solution

3 - The 2 parts gonna have to be glued together and really stick. So i guess the best would be to use ABS for both to ensure this assembly to last

Thanks

I searched for days online to see what could fit for the flexible part (and not too expensive)

Shapeways have something called “strong and flexible” material which seems to be the kind of product which could work I think

Thats my only idea so far

Hi massanu,

Just one thing to add, if you have modelled the part in CAD exactly how the real part is (the one in your video) then unless you use the same material and process then the strength and stiffness of the part will be different. Since that part is injection molded its strength will be the same in all directions but a 3d printed part (desktop FDM machine) will be much weaker in the z plane. So I am just saying that you may not find a material that will do the job you want by itself, and you may need to tweak the design aswell (eg increase thickness for small latches or print in a different orientation).

It looks like a interesting project though, can’t wait to see how it turns out!

Cheers

Andrew

I would go for common ABS, although PC/ABS was used in the initial part. First of all because ABS is cheaper and secondly because you will have a hard time finding somone to print PC/ABS as it needs a very high printing temperature, which the least of todays FDM printers can archieve.

Additionally you can use the acetone on ABS to strengthen the part, this will improove the durability in the z plane mostly, but also inbetween all printed lines, so I’d definitely do that. However be carefull when handling acetone, it evapors at room temperature (like alcohole) and it’s highly flammable, any ignition source has to be moved away. You may find acetone vapor smoothing methods, but applying acetone with a paint brush works just as well and nearly as evenly (you have more control over what parts to smooth out and which are fine already). Also the brush method is a lot safer, because you work with liquid (visible) acetone, while the vapor may sneak through any small hole in your container to reach an ignition source.

Since acetone dissolves ABS, you can also brush on some acetone to two surfaces and just press them together, within a few minutes (sometimes even 30 sec) the two parts are chemically welded together, the created bond is usually even stronger then the 3d prints themself.

Painting ABS is very easy, you can use a primer, but usually that’s not necessary, any acrylic based paint sticks very well. I’d recommend to use spray paint as it spreads very evenly and the thin layers stick to ABS very well.

Especially if you don’t use any primer you should clean your ABS prints properly, use plastic cleaners and silicone removing liquids, both can be found in artists stores or hardware stores (basically any shop, that sells paint related stuff). It’s definitely worth the investment, to get a bottle of both cleaners, they last forever and peeling off the paint from your print would be very painfull.

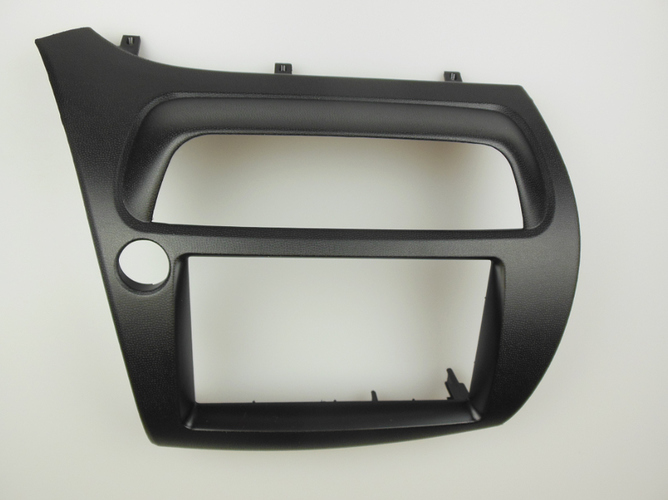
ABS is available in a huge variety of colors, if you are looking for a normal black, you might want to get it precolored.

Using at least (!) two coats of clear spray paint is highly recommended, otherwise scratches etc. may damage the layer of color.

Feel free to ask me, if you have any other questions, btw ABS tends to shrink a bit when 3d printing it, I’ve used a scaling factor of 1,016 which gave me tolerances of less then +/-0,5mm.

The factor might be changed for your specific machine, printer settings and ABS. Color and composition of the ABS can have a huge influence on this factor.

Cheers,

Marius

I agree with Marius’ comments, and for your first attempt it should all print just fine in normal ABS, it’s a good material for the job. The more exotic materials can be trickier unless you have an all metal hot end.

I also echo that you are designing a replacement, 3D-printed part. Some parts will need to be identically shaped to the original for the parts to fit, elsewhere you have freedom to add material for bracing, or thin out points to ensure flex etc.

Acetone vapour smoothing could add a lot to your strength and appearance, but practise on a sample, it’s fiddly and an analogue process. Painting with epoxy, or smoothing with car body filler and then painting car paint, could also improve finish and strength

1 Like

Thanks Marius, all this will help me and a lot of people I think

1 - I will go for ABS for both parts, and glue them together with Acetone. Making them stronger by brushing acetone on the edges is a very good idea (especially for the snap-fits which are the weaknesses of the design)

2 - For the front part, I will need to paint it, so I will probably sand it by hand using a sanding block before printing. Maybe using some bodyfiller, I gonna try to find one working good with ABS

I will let you know about the result, I hope it gonna work.

My only concern will be that the parts dont break when trying to insert them in the center console of the car, I will probably have to use a little bit of force for that :slight_smile:

Amazing help guys !

Using a body filler and then painting is a great idea. It will probably get a very smooth and nice finish for the front bezel !

Thanks you

Hi Andrew,

So are you ready to print the front bezel in ABS :slight_smile:

I updated the files

1 Like

Hello,

the best i think is the XT from colorfab,

Adrien.

This is going to be a 2 part piece, whats the size and dimensions?

HIPS (High Impact Polystyrene) is probably a good choice here, similar temperature for extrusion as ABS, but VERY resilient and good for ‘snap fit’ parts.

PC/ABS is exactly what the Up! (Afinia, if you’re from the states) printer uses as its “ABS” filament. (Yes, I was with a company who got some Up! filament analysed and it is around 20% polycarbontate). PC/ABS is not hard to extrude, if an printer as basic as the Up! can handle it, most will handle it.

Personally I would investigate HIPS. Where I buy filament, HIPS is cheaper than ABS anyway, can be used as support material for ABS prints if you decide you don’t like it (dissolves in limonene). The real strong point for HIPS is that when printing snap-in fittings, they bend and spring back a lot more than ABS parts - ABS fatigues very quickly, a printed ‘buckle’ will always last longer printed in HIPS than ABS.