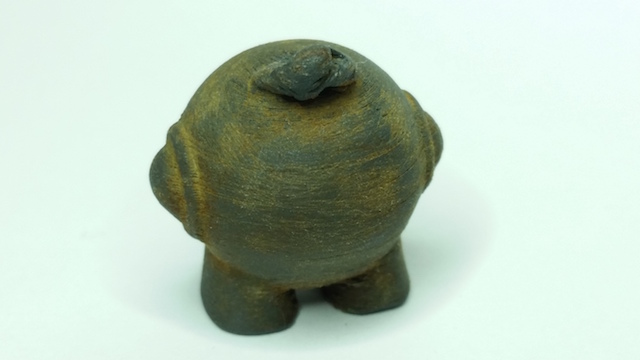
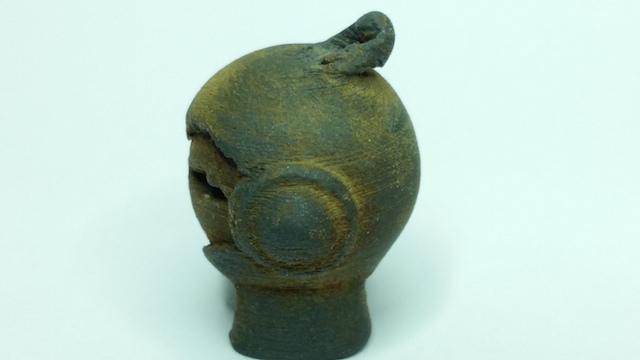
Let me introduce you to Rusty Magnetic Marvin.
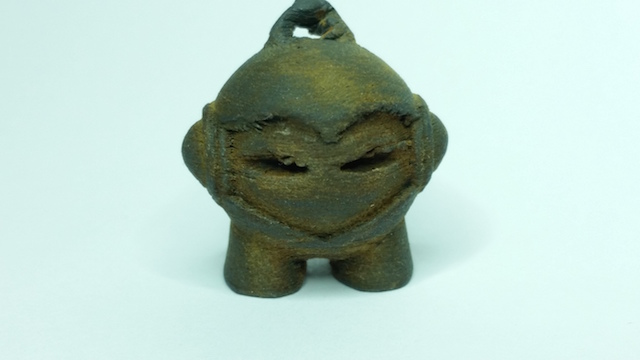
@Proto_pasta’s new filament Magnetic Iron has a cool feature, apart from the fact that it is magnetic off course, it also rusts! So I decided to test this on a Marvin print.
The Magnetic Iron filament prints really well, easier than bronzefill and copperfill in my opinion. But it has that same clayish feeling and appearance when you extrude the material.
So let’s get practical, how was Marvin sliced for this print.
(I use Slic3r and Repetier Host with a highly modified DaVinci 1.0, so keep in mind that things may vary a little in your own set up.)
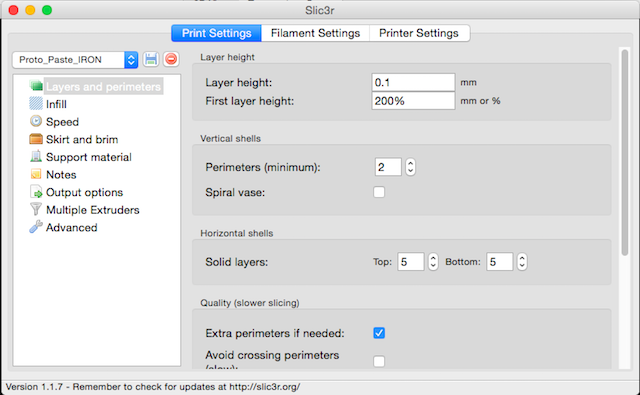
Print/Extruder settings:
- Layer height: 0.1
- First Layer: 200%
- Speed: 50 mm/s
- Brim: 3 mm (optional, the material also sticks very well without)
- Infill: 20% rectilinear
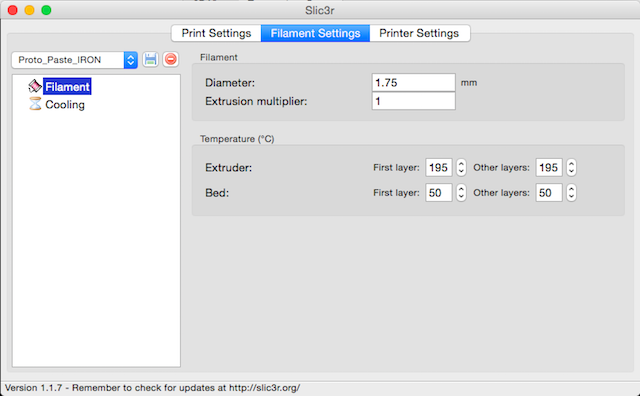
Filament settings:
- Extruder Temp.: 195 °C
- Bed Temp.: 50 °C
Printer settings:
- Nozzle Width: 0.4mm
- Just add ±0.3mm to the Z offset here, so that the clayish material will extrude more easily the first layer. But again this could be printer dependent.
- Print time: ± 1 hour
Post printing**:**
Be patient while your heatbed cools down, as stated before this material sticks really well (to my glass heatbed). You risk damaging the glass (or your print) if you force-remove the print. After the heatbed has cooled down, a little wiggle/slight force should be enough.
If there are any imperfections you can address these with a sharp hobby knife.
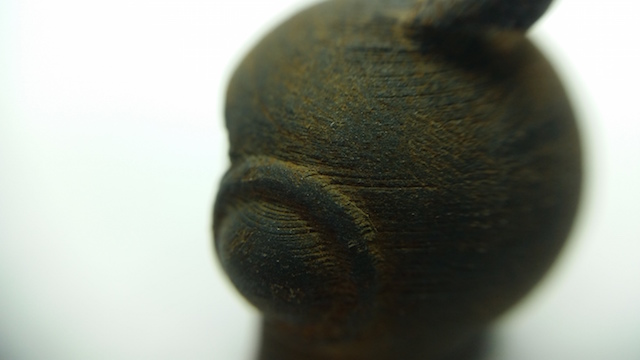
When you are satisfied with the print, sand down the rough edges with some sandpaper (I used a 180 grid and a 400 grid piece of sandpaper). This will reveal more of the iron particles to the surface. You now should see a slight silverish finish.
Done!
Well if you just want an Iron/Magnetic Marvin that is.
If you would like to create that rusty finish you should keep reading!
After you revealed the iron particles, you could expose your Marvin to mother nature and be very patient. But if you’re seeking for a much faster way to create a rusty finish, you can dissolve a sufficient amount of salt in water (couple of table spoon in a glass). Make sure the salt completely dissolves, put your Marvin in there and wait for a couple of days (4/5).
After 24 hours (or less) you should see the rust starting to form. Brushing your Marvin every now and then with a steel brush seems to improve the rusting, since your expose more iron particles to the salt.
When you are satisfied with the amount of rust formed on your Marvin, take your print out of the salted water and leave it to dry for a while. If you have used too much salt, Marvin will start to look a little white after drying. These are just salt crystals and you can wash them off with some water. Don’t worry, the rust will not be affected by this cleaning procedure.
That’s all!
Enjoy your rusty Marvin!