key23d
1
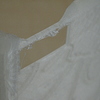
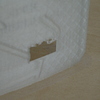
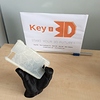
Today I printed a Day 1 case and it had similar problems as I already found in other cases. See pictures.
This makes the Hubs’ job a very difficult one because people who order a FairPhone case and get in contact with 3D printing for the first time don’t know what they can expect. They assume the case is as smooth as a cast case which of course isn’t the case  !
!
The case needs (unnecessary) cleaning which doesn’t make it prettier!
@rooiejoris can you please do something about this? The reviews for FairPhone cases come up with 5 stars for everything exept the print quality! This is not good for the Hubs’ reputation! Please also have a look at other threads about this issue.
Kind regards, Guy

3 Likes
key23d
2
and this is the final result after 15 minutes of cutting and filing with the risk of ruining the case in the process!
@Luuk This issue needs to be solved!
Kind regards, Guy
Hi Guy,
@Luuk can you share any learnings on dealing with the overhang?
Thanks
Hi Guy, [and @Luuk and @Filemon]
Tomorrow the elephant will be finished at schiphol, so next week I can spend some serieus time reading all the comments, sorry… [www.stapvandeolifantaf.nl]
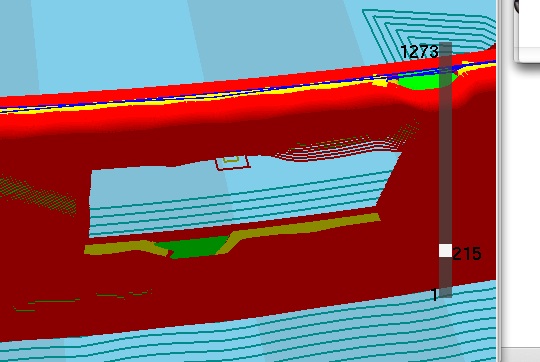
I just had a quick look at the pictures, but this is a different problem than discussed before no…?! This is all about the bridging problems. In my experience that you get better bridging when printing colder. Advanced tricks could be to hack the gcode and place manually a M104 S… for you favorite temp setting. or print the whole casing colder [but that may result is a less strong casing].
Another option is to print with support, but i don’t really like that personally. Maybe i can add a support in a future stl, but then somebody has to test that as well…
The other problem i coulnd’t find [with the loose parts near the top]. I have the feeling that it has to do with layerheight and bad luck getting exact the wrong horizontal plane at the wrong height. I willl check the file and maybe make it less horizontal.
Can you send the gcode or settings ini so i can check with the same parameters…
cheers \ joris
key23d
5
Hi Joris,
thanks for your reply!
When you add support in Cura it will not print because it is to narrow (I think). The best way would be to add some support in the model so the bridging problem disappears. This is different with every filament so hard to figure out if you only print a few cases per color and it will take a very long time also.
This problem is different because it’s a different case but they are all the same kind of issues. I tried also different layer heights but that doesn’t take the problem away.
The loose parts near the top of the holes are really printed so they have to be removed and they probably also interfere with the bridging, causing the mess.
I’m happy to do some testing on the changed designs if that can help!
Here I can’t attach the ini-file I use; can I mail this to you?
Good luck with finishing the Elephant project!
Kind regards, Guy
I took a look at the stl of day05 and found some extra faces which could be the problem. I manually removed them, so if it works i can repair and upload new stl files for the other days as well…
i also opened it in meshmixer and removed a ‘seperate shell’ [whatever that may be] and it seems to be solved as well. That could save me a lot of handwork where i can make misstakes if it works…
cheers \ joris
day05_repair.stl (15.7 MB)
day05_seperateshellremovemeshmixer.stl (15.7 MB)
key23d
7
Hi Joris,
thanks for your effort! I will test it in the morning.
Kind regards, Guy
key23d
8
Good Morning @rooiejoris and @Luuk
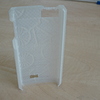
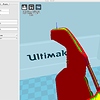
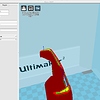
I checked the STL-file with Cura and neither change did the trick :-(.
See pictures.
And what about the idea to put a minimal support for the holes in the design?
Kind regards, Guy
These are the settings I use:
[profile]
layer_height = 0.1
wall_thickness = 1
retraction_enable = True
solid_layer_thickness = 1
fill_density = 20
nozzle_size = 0.4
print_speed = 60
print_temperature = 205
print_temperature2 = 0
print_temperature3 = 0
print_temperature4 = 0
print_bed_temperature = 70
support = None
platform_adhesion = Brim
support_dual_extrusion = Both
wipe_tower = False
wipe_tower_volume = 15
ooze_shield = False
filament_diameter = 2.85
filament_diameter2 = 0
filament_diameter3 = 0
filament_diameter4 = 0
filament_flow = 100.0
retraction_speed = 40.0
retraction_amount = 4.5
retraction_dual_amount = 16.5
retraction_min_travel = 1.5
retraction_combing = True
retraction_minimal_extrusion = 0.02
retraction_hop = 0.0
bottom_thickness = 0.2
layer0_width_factor = 100
object_sink = 0.0
overlap_dual = 0.15
travel_speed = 150.0
bottom_layer_speed = 40
infill_speed = 0
inset0_speed = 40
insetx_speed = 0
cool_min_layer_time = 5
fan_enabled = True
skirt_line_count = 2
skirt_gap = 3.0
skirt_minimal_length = 150.0
fan_full_height = 0.5
fan_speed = 100
fan_speed_max = 100
cool_min_feedrate = 10
cool_head_lift = False
solid_top = True
solid_bottom = True
fill_overlap = 15
support_type = Grid
support_angle = 60
support_fill_rate = 15
support_xy_distance = 0.7
support_z_distance = 0.15
spiralize = False
simple_mode = False
brim_line_count = 10
raft_margin = 5.0
raft_line_spacing = 3.0
raft_base_thickness = 0.3
raft_base_linewidth = 1.0
raft_interface_thickness = 0.27
raft_interface_linewidth = 0.4
raft_airgap = 0.22
raft_surface_layers = 2
fix_horrible_union_all_type_a = False
fix_horrible_union_all_type_b = False
fix_horrible_use_open_bits = False
fix_horrible_extensive_stitching = False
plugin_config =
object_center_x = -1
object_center_y = -1
[alterations]
start.gcode = ;Sliced at: {day} {date} {time}
;Basic settings: Layer height: {layer_height} Walls: {wall_thickness} Fill: {fill_density}
;Print time: {print_time}
;Filament used: {filament_amount}m {filament_weight}g
;Filament cost: {filament_cost}
;M190 S{print_bed_temperature} ;Uncomment to add your own bed temperature line
;M109 S{print_temperature} ;Uncomment to add your own temperature line
G21 ;metric values
G90 ;absolute positioning
M82 ;set extruder to absolute mode
M107 ;start with the fan off
G28 X0 Y0 ;move X/Y to min endstops
G28 Z0 ;move Z to min endstops
G1 Z15.0 F{travel_speed} ;move the platform down 15mm
G92 E0 ;zero the extruded length
G1 F200 E3 ;extrude 3mm of feed stock
G92 E0 ;zero the extruded length again
G1 F{travel_speed}
;Put printing message on LCD screen
M117 Printing…
end.gcode = ;End GCode
M104 S0 ;extruder heater off
G91 ;relative positioning
G1 E-1 F300 ;retract the filament a bit before lifting the nozzle, to release some of the pressure
G1 Z+0.5 E-5 X-20 Y-20 F{travel_speed} ;move Z up a bit and retract filament even more
G28 X0 Y0 ;move X/Y to min endstops, so the head is out of the way
M84 ;steppers off
G90 ;absolute positioning
;{profile_string}
start2.gcode = ;Sliced at: {day} {date} {time}
;Basic settings: Layer height: {layer_height} Walls: {wall_thickness} Fill: {fill_density}
;Print time: {print_time}
;Filament used: {filament_amount}m {filament_weight}g
;Filament cost: {filament_cost}
;M190 S{print_bed_temperature} ;Uncomment to add your own bed temperature line
;M104 S{print_temperature} ;Uncomment to add your own temperature line
;M109 T1 S{print_temperature2} ;Uncomment to add your own temperature line
;M109 T0 S{print_temperature} ;Uncomment to add your own temperature line
G21 ;metric values
G90 ;absolute positioning
M107 ;start with the fan off
G28 X0 Y0 ;move X/Y to min endstops
G28 Z0 ;move Z to min endstops
G1 Z15.0 F{travel_speed} ;move the platform down 15mm
T1 ;Switch to the 2nd extruder
G92 E0 ;zero the extruded length
G1 F200 E10 ;extrude 10mm of feed stock
G92 E0 ;zero the extruded length again
G1 F200 E-{retraction_dual_amount}
T0 ;Switch to the first extruder
G92 E0 ;zero the extruded length
G1 F200 E10 ;extrude 10mm of feed stock
G92 E0 ;zero the extruded length again
G1 F{travel_speed}
;Put printing message on LCD screen
M117 Printing…
end2.gcode = ;End GCode
M104 T0 S0 ;extruder heater off
M104 T1 S0 ;extruder heater off
M140 S0 ;heated bed heater off (if you have it)
G91 ;relative positioning
G1 E-1 F300 ;retract the filament a bit before lifting the nozzle, to release some of the pressure
G1 Z+0.5 E-5 X-20 Y-20 F{travel_speed} ;move Z up a bit and retract filament even more
G28 X0 Y0 ;move X/Y to min endstops, so the head is out of the way
M84 ;steppers off
G90 ;absolute positioning
;{profile_string}
start3.gcode = ;Sliced at: {day} {date} {time}
;Basic settings: Layer height: {layer_height} Walls: {wall_thickness} Fill: {fill_density}
;Print time: {print_time}
;Filament used: {filament_amount}m {filament_weight}g
;Filament cost: {filament_cost}
;M190 S{print_bed_temperature} ;Uncomment to add your own bed temperature line
;M104 S{print_temperature} ;Uncomment to add your own temperature line
;M109 T1 S{print_temperature2} ;Uncomment to add your own temperature line
;M109 T0 S{print_temperature} ;Uncomment to add your own temperature line
G21 ;metric values
G90 ;absolute positioning
M107 ;start with the fan off
G28 X0 Y0 ;move X/Y to min endstops
G28 Z0 ;move Z to min endstops
G1 Z15.0 F{travel_speed} ;move the platform down 15mm
T2 ;Switch to the 2nd extruder
G92 E0 ;zero the extruded length
G1 F200 E10 ;extrude 10mm of feed stock
G92 E0 ;zero the extruded length again
G1 F200 E-{retraction_dual_amount}
T1 ;Switch to the 2nd extruder
G92 E0 ;zero the extruded length
G1 F200 E10 ;extrude 10mm of feed stock
G92 E0 ;zero the extruded length again
G1 F200 E-{retraction_dual_amount}
T0 ;Switch to the first extruder
G92 E0 ;zero the extruded length
G1 F200 E10 ;extrude 10mm of feed stock
G92 E0 ;zero the extruded length again
G1 F{travel_speed}
;Put printing message on LCD screen
M117 Printing…
end3.gcode = ;End GCode
M104 T0 S0 ;extruder heater off
M104 T1 S0 ;extruder heater off
M104 T2 S0 ;extruder heater off
M140 S0 ;heated bed heater off (if you have it)
G91 ;relative positioning
G1 E-1 F300 ;retract the filament a bit before lifting the nozzle, to release some of the pressure
G1 Z+0.5 E-5 X-20 Y-20 F{travel_speed} ;move Z up a bit and retract filament even more
G28 X0 Y0 ;move X/Y to min endstops, so the head is out of the way
M84 ;steppers off
G90 ;absolute positioning
;{profile_string}
start4.gcode = ;Sliced at: {day} {date} {time}
;Basic settings: Layer height: {layer_height} Walls: {wall_thickness} Fill: {fill_density}
;Print time: {print_time}
;Filament used: {filament_amount}m {filament_weight}g
;Filament cost: {filament_cost}
;M190 S{print_bed_temperature} ;Uncomment to add your own bed temperature line
;M104 S{print_temperature} ;Uncomment to add your own temperature line
;M109 T2 S{print_temperature2} ;Uncomment to add your own temperature line
;M109 T1 S{print_temperature2} ;Uncomment to add your own temperature line
;M109 T0 S{print_temperature} ;Uncomment to add your own temperature line
G21 ;metric values
G90 ;absolute positioning
M107 ;start with the fan off
G28 X0 Y0 ;move X/Y to min endstops
G28 Z0 ;move Z to min endstops
G1 Z15.0 F{travel_speed} ;move the platform down 15mm
T3 ;Switch to the 4th extruder
G92 E0 ;zero the extruded length
G1 F200 E10 ;extrude 10mm of feed stock
G92 E0 ;zero the extruded length again
G1 F200 E-{retraction_dual_amount}
T2 ;Switch to the 3th extruder
G92 E0 ;zero the extruded length
G1 F200 E10 ;extrude 10mm of feed stock
G92 E0 ;zero the extruded length again
G1 F200 E-{retraction_dual_amount}
T1 ;Switch to the 2nd extruder
G92 E0 ;zero the extruded length
G1 F200 E10 ;extrude 10mm of feed stock
G92 E0 ;zero the extruded length again
G1 F200 E-{retraction_dual_amount}
T0 ;Switch to the first extruder
G92 E0 ;zero the extruded length
G1 F200 E10 ;extrude 10mm of feed stock
G92 E0 ;zero the extruded length again
G1 F{travel_speed}
;Put printing message on LCD screen
M117 Printing…
end4.gcode = ;End GCode
M104 T0 S0 ;extruder heater off
M104 T1 S0 ;extruder heater off
M104 T2 S0 ;extruder heater off
M104 T3 S0 ;extruder heater off
M140 S0 ;heated bed heater off (if you have it)
G91 ;relative positioning
G1 E-1 F300 ;retract the filament a bit before lifting the nozzle, to release some of the pressure
G1 Z+0.5 E-5 X-20 Y-20 F{travel_speed} ;move Z up a bit and retract filament even more
G28 X0 Y0 ;move X/Y to min endstops, so the head is out of the way
M84 ;steppers off
G90 ;absolute positioning
;{profile_string}
support_start.gcode =
support_end.gcode =
cool_start.gcode =
cool_end.gcode =
replace.csv =
preswitchextruder.gcode = ;Switch between the current extruder and the next extruder, when printing with multiple extruders.
;This code is added before the T(n)
postswitchextruder.gcode = ;Switch between the current extruder and the next extruder, when printing with multiple extruders.
;This code is added after the T(n)
It did some tricks, I don’t see the problem explained on page one in “FairPhone case day 5.pdf”. That was the most visible thing if i understood right…
Attached a non optimized stl file, cab you check if this also have these small misstakes…? maybe meshlab screws up something when removing faces…
day05_uncompressed.stl (96.3 MB)
key23d
10
Hi Joris,
indeed the problem described in the PDF didn’t show in the former version anymore.
This last file doesn’t show any mistakes! So probably something goes wrong compressing the file?
It’s probably best to send the uncompressed files for all the models to all the FairPhone Badge holders so they can use that one for the actual printing.
Leaves the matter of the support in the holes.
Thanks for your effort so far!
Kind regards, Guy
key23d
11
Hi Joris,
indeed the problem described in the PDF didn’t show in the former version anymore.
This last file doesn’t show any mistakes! So probably something goes wrong compressing the file?
It’s probably best to send the uncompressed files for all the models to all the FairPhone Badge holders so they can use that one for the actual printing.
Leaves the matter of the support in the holes.
Thanks for your effort so far!
Kind regards, Guy
I will take a look on the support, that shouldn’t be a problem, thats why i started with the “strange” things…
A possible problem with the uncompressed file is that the path length can get so short that you are unable to print in a nice speed, but you will notice that during printing.
cheers \ joris
key23d
13
Hi Joris,
indeed the problem described in the PDF didn’t show in the former version anymore.
This last file doesn’t show any mistakes! So probably something goes wrong compressing the file?
It’s probably best to send the uncompressed files for all the models to all the FairPhone Badge holders so they can use that one for the actual printing.
Leaves the matter of the support in the holes.
Thanks for your effort so far!
Kind regards, Guy
key23d
14
Hi Joris,
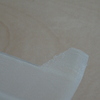
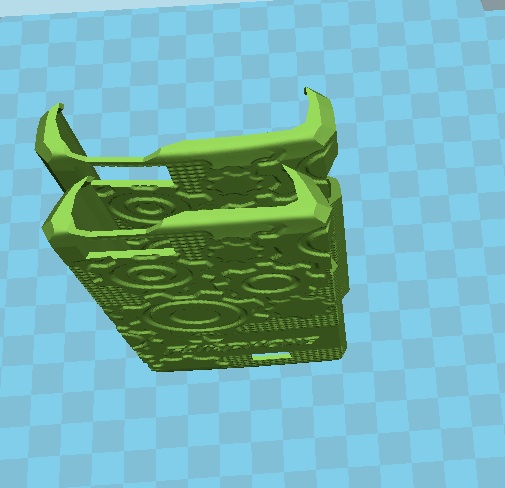
I am printing the uncompressed one right now and I noticed that the shape is different from the normal shape!
The one at the bottom in the picture is the uncompressed one and the other one is day05 Repair.
The edge is much more bent to the inside on the first one so something is wrong!
It also takes about 4 hours to print the uncompressed one by the way.
Kind regards, Guy
oops, cleaned up the blender file a bit too much, attached the better version…
day05_uncompressed02.stl (96.3 MB)