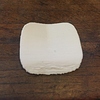
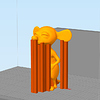
I have been trying to print this item in ABS. I have tried to print it vertically and horizontally. When I print vertically, the start of the print is always messed up. I am not sure what causes this. I am using ReplicatorG for the first printing and Simplify3D for the second. When I lay it horizontally, it was even worse. I am attaching a pic of the vertical print. Any suggestions would be grateful accepted. Thanks.
Neilford
1 Like
Perry_1
2
You definitely have bad ABS warping, so you should test with your temp settings, make sure your have good first layer adhesion, and you have enclosed your printer if you can. Also, looks like you are overextruding.
But, more information would be helpful in diagnosing your issue.
Do your prints normally work? Do you successfully print ABS often? Is this just this model that you are having difficulty with.
It would also be helpful to see what the STL looks like, so we have some idea of what you are shooting for.
2 Likes
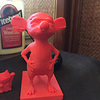
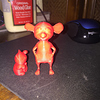
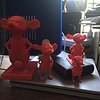
I am printing at 230 and the bed is 110. I have taped the handle ports and I put a tool of the top to cut down on air flow into printer while printing. I printed a lucky cat that has printed well (i will include pic), but I had a mouse that I can never get the ears to print well, even with supports, at many different sizes (including pic. I fixed offset on head, but ears are always messed up) . I can take a snapshot of the stl file for this piece. No kind support, raft ever seems to make that item print well.
Perry_1
4
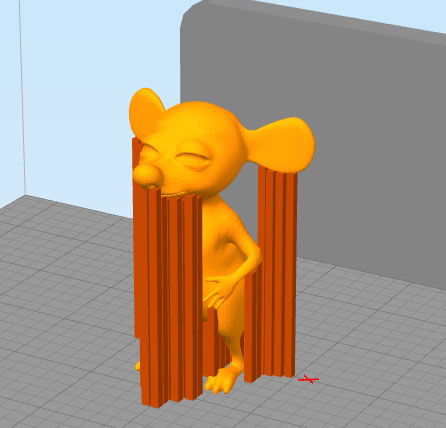
Yeah, those mouse ears are going to be difficult to print. Gravity is killing you there. You just have to get your supports dialed in, and those ears are just plain hanging out into mid air. You need lots more support to get those right.
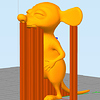
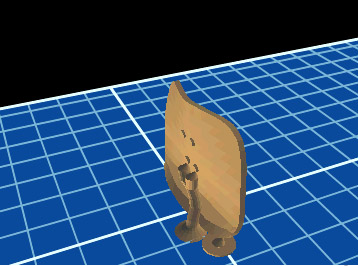
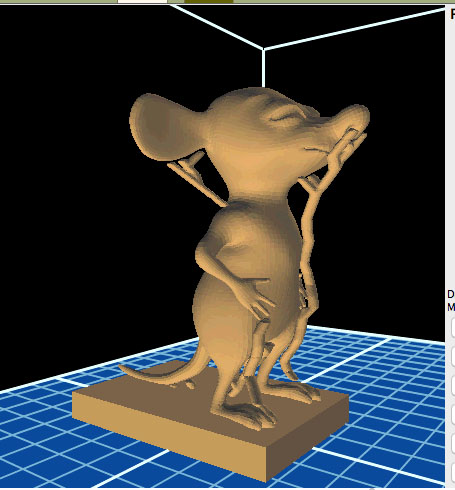
Here are a few of the mouse files with supports. None produced good ears.

It’s a little counter intuitive when printing with ABS, as you run the risk of inducing warping, but try turning on the cooling fans at about 2/3rds the height of your print. You want them on before it gets to the ears, but would probably be overkill for the entire print and could induce warping if it breaks your adhesion loose from the bed. I won’t guarantee it will totally fix the problem, but it should help those microwarps on the bottom layers of the ears.
Also, you can try to increase the minimum time per layer so that it slows down a bit on those top layers which are smaller (less material) than the lower layers. That will give the material some time to cool and will help the ears a bit. Your slicer should have a setting for that somewhere.
It’s going to be difficult regardless.
You definitely have a warping problem. Check adhesion and calibrate your printer properly. As for the mouse, it looks pretty small, you could try printing on a not so hot platform (around 70C) and try using a much lower temperature. Those ears are difficult but I have had good results on small detailes parts by printing ABS almost as if it was PLA.
Perry_1
8
Thanks for providing those pictures from your software.
OK, you just do not have enough support under those mouse ears. Remember that your printing is printing almost liquid out the nozzle, gravity will let if fall. You need to increase the support.
Forget the tree support, in the first two pictures. You will just never get there.
It looks like in the 3rd and 4th pictures you are using S3D. Good.
Read this :Adding and Modifying Support Structures | Simplify3D Software
Set your support material at .1 or .2mm, and about 40% volume. If auto support doesnt get it all, manually add support underneath the whole length of the ear, from the head outward to the tip of the ear.
BTW, when testing this, you dont have to print he whole mouse. Lower it until just the head is above the platform, then manually GENERATE support at .1mm, then if you have to manually ADD support. No need to print the complete model until you get it dialed in.
I have tried many sizes of the mouse. The max was 3", the smallest was a little over an inch. All had similar issues with the ears. Other issues, not picture, was that Simplify3D supports ate into the tail. I am attaching a pic of some of the attempts.
In the past, as I was trying to print this, I acquired Simplify3D because I thought that with their support approach, I would get better results. I have not posted all the factory files that I used to try to print this object, but I did try more extensive support on the ears because the default arrangement was not adequate. It didn’t help much and a side effect was that the supports ate into the model. I didn’t see any control that could minimize the effect of the support on the model itself. I tried thinner supports, but often they would break loose from the platform before the printer got to the ears. There seems to be an issue with objects shaped like the ears, as evidenced with the chair that exhibited similar issues. I will try to incorporate all of your suggestions to see if I can get better prints, but I am a bit frustrated, especially when I see other printers seem to, successfully, print objects like these.
You can manually edit supports if you see they are touching other parts of the model. There is an option to set the supports to start from platform only. Sometimes when the file has mesh errors or is not a solid, S3D and other softwares fix the model but there is the possibility of confusion, causing strange behavior like overlapping supports, walls or infill. Support parameters are very sensitive, particular on difficult overhangs like those ears. Too close and they will ruin the part, too loose and they won’t support anything; too thin and they fall off… but those things can very so much between printers, filament brands and even colors that is imposible to tell you a precise formula. What I´d certainly do is low down the temperature, low down speed, increase support thickness and reduce their size you get more smaller but strong supports. In any case, those ears are simply not designed to be FDM printed, therefore is unlikely to get a perfect result. However, small flaws on ABS are easier to fix with sandpaper and mineral oil or use a few drops of acetone.