3D printing dual colour text models can be a tricky process. There are lots of examples available online, and building a model is fairly straight forward, but getting it to print well is challenging, especially if the font used is on the small side.
When developing the MyWay Sign (www.mywaysign.com), we wanted to print small font text on both sides of each sign pointer, so it could be easily read from different angles.

To achieve a nice clean print, we had to print the sign pointer vertically; else we’d need to use supports and would mess up the finish on the side facing down.
Throughout the product development cycle, we had troubles with consistently maintaining high quality prints. We had problems with adhesion, warping and excessive nozzle flow depositing schmutz on the signs. We were also getting shadow images of the text due to the second nozzle dragging.
We managed to improve the consistency of the prints by upgrading the printer with a glass build plate and aluminum Z-arms to improve rigidity, reduce vibration and eliminate warping. We were getting consistent quality, but the quality was still too low. The text in particular was prone to over/under extrusion and there was still schmutz and shadowing to resolve. With the hardware squared away we started to evaluate the print process in order to improve the quality.
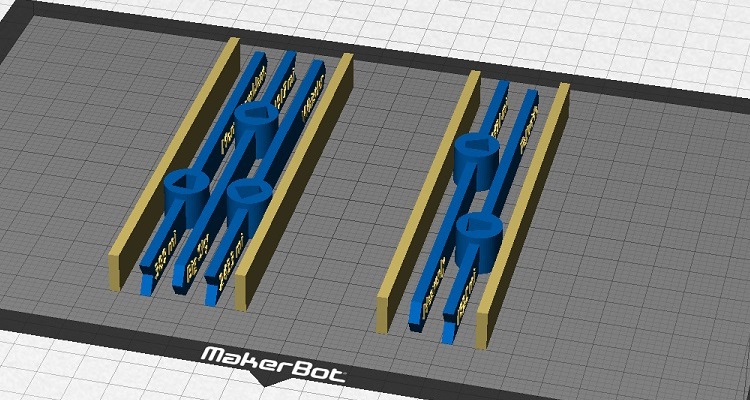
The first thing we did was layout the sign pointers in tight bundles of 3 or less. They were grouped and positioned on the build plate so when one print head was in use, the other was not getting dragged over any sign pointers. This solved the text shadowing quite nicely. To eliminate the schmutz, we added extra purge walls in the text colour to reduce oozing and to frequently wipe the nozzles, keeping them as clean as possible.
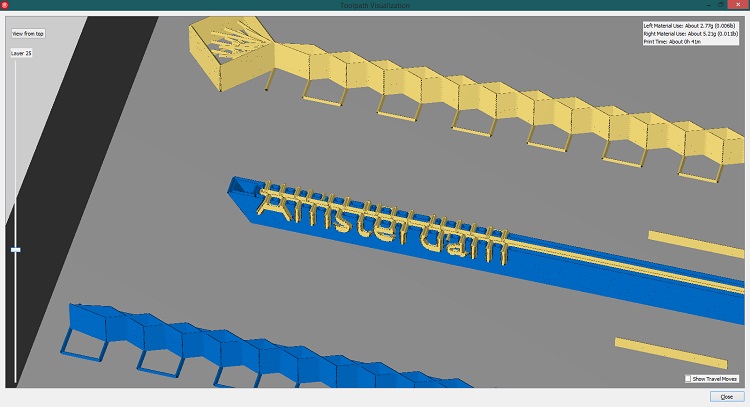
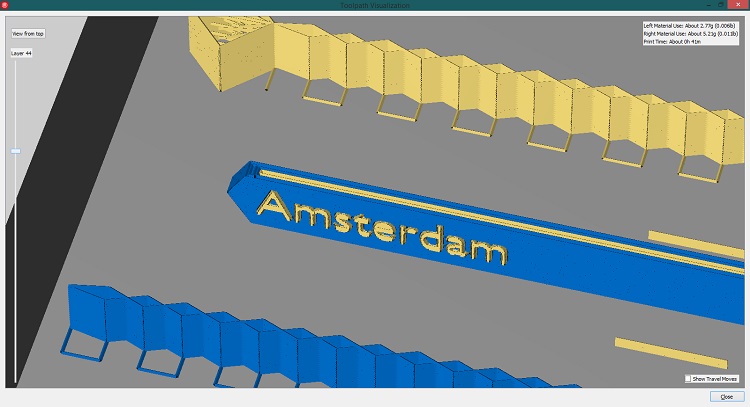
The final problem we uncovered was related to the filament flow when printing the text. Since the font was so small and the letters were being printed upright, the extruder was printing very short and thin bits of the text. These bits were causing excessive start/stop feeding of the filament resulting in small blotches and divots on the text. There was no consistent flow to the filament feed, it was too choppy. The solution was to change our design by adding an extra but hidden element. We inserted a thin plate down the center of the sign pointer and bonded the text to it. This allowed the extruder to print more smoothly.
The result was much better filament flow yielding nice clean text. We could even print small accents and punctuation without any problems.
In the hobbiest and prosumer 3D printer market, there aren’t any “set it and forget it” printers. They are fiddly machines that require some know-how to operate successfully. Understanding materials, designs and processes for 3D printing will help you to improve your capabilities and differentiate you from others.
Print Summary: