Here it is; ever since I’ve assembled my Turnigy Fabricator I have printed quite a few Marvins. I was mostly giving those away so I was choosing the settings that took the least amount of time, but now it was time to make one as a test order.
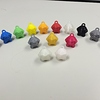
So here it is: I’ve managed to print one in 20 micron layer-height settings in Cura, but it did not seem to make a difference when i printed one in 60 micron (so I don’t really believe it actually prints in such accuracy).
Since my filament was translucent, simply increasing the infill changed the way the Marvin looks. Lines on Marvins on the right hand side are simply the infill patterns visible. (it does look pretty cool though)
The one on the left had the “Bottom/top layer height” set to 0.6 mm, hence the “cap” . setting it to 0.3 mm solved it
Nevertheless I’ve chosen these to be my ideal Marvin settings:
- Layer height: 0.06
- 10-20% Infill
- Printing speed: 70mm/s
- Top/Bottom layer height :0.2/0.3
- Printing temperature: 200 C
Lastly, it’s important to note that you have to use Cura 14.2, otherwise it’s difficult to precisely predict what the printer will do, because of the bug in the software. And I was using Esun filament, which quality I cannot guarantee, although I have no complaints so far.
Next up: printing a good Marvin as fast as possible - stay tuned.
If you guys have anything that you’ve encountered with this printer or want to share please do so, I am very curious what this printer can do!
8 Likes
Cool. I would like to see how the Fabrikator Mini stacks up against this.
Nice job on the build though!
1 Like
5-star Marvin! Only you, Arnie 
1 Like
I haven’t really heard anything about that one, but damn its tiny!!! And cheap! Perfect for printing Marvins ^^
1 Like
Yea looks cool and good value for money for people who are new to the world of 3D Printing.
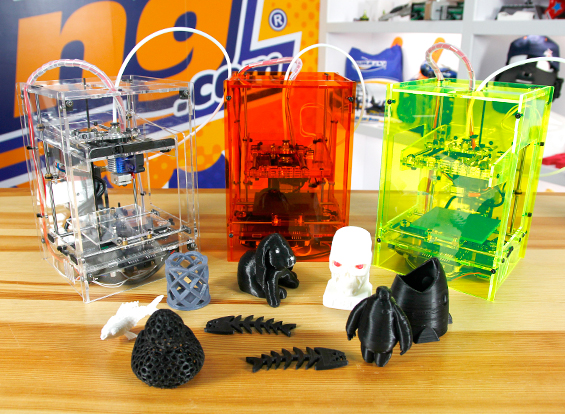
this was done on my Rep 2 at the course setting (0.3mm, 6% infill, 2 shells, varying temp depending on material used) and at the fastest rate. Each took just under 10 minutes. Shown are mostly PLA, a couple of PET-G, color changing with UV and Temp as well as a glow in the dark. Just finished one in copper that was not in the pic. The Marvin is a good way to test print settings, especially where the body meets the legs/feet, if your temps are too hot, you will get droops there, also strings at the top.
I have some in .1mm but the difference in the part was not that great and took 3x the time.
1 Like
Whoah! Those are some real nice Marvins! Great job. For a 10 minute print they look awesome. I’ve made one in 6 minutes and it still looked pretty good. It was 0.25 layer height. Wonder how much faster can it get.
any tips on printing marvin on abs? I keep getting the hook to curl, I currently have .1mm layer height, 250 degrees and 100 degrees on the bed with 20 microns infill but it keeps curling on the hook. any advise Is appreciated.
what slicer do you use? At your 10% infill you can see the inner support structure. if you use cura you can open expert settings, go to the infill section and check “Infill prints after perimeters”. Don’t know if you use cura or have already played with this setting but hope it gives you positive results.
_will
How do you change infill on Fabricator interference