Hi everyone, I’ve trailed through youtube and tried to navigate the forums to compile a definitive list for this. It seems to go without saying that these printers need modding to get the best from them. Can anyone suggest the must have mods (and the nice to haves) to help me get this machine to its best.
Also to piggy back on this, How beneficial is the sailfish firmware over the out of box one?
I installed LEDs in mine to light the build area, also printed some new Z axis brackets because there was too much play in the originals. I added a cooling fan aswell to blow air on the print, I just bought a transistor to control the fan in the firmware. I moved the on switch to the front along with a master fan switch which Allows me to turn the extruder fan on/off aswell as being controlled by the printer.Also the sailfish firmware allows you to adjust the print temperature whilst printing as well as increase/ decrease the print speed, overall I think it is similar to makerbot 7.5(latest) for the crc bizer or the replicator dual it just has extra features.
In order of priority for me was as follows to make it print 10+ hours with no issues. Filament guide Mk8 style extruder with spring Y axis pillow blocks Glass bed Enclosure with heat source such as an incandescent bulb for abs printing Haven’t done but are very good mods Z axis stabilizer Oil preg bronze bushings Y axis motor cable snake thru conveyor SoftwaRe I swear by simplify 3d. Made my prints 10x better when properly calibrated.
- every once in a while tighten the screws from the housing, they tend to untighten after a while due to vibrations
- Active cooling system to cool the printed part
- Glass covers especially for the left and right side of the printer
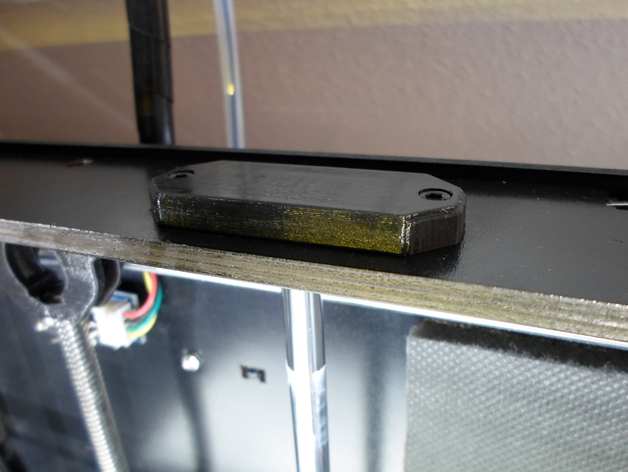
- Top corners: Covers for the CTC Dual top corner holes by DocVader - Thingiverse
- Sailfish firmware - I really recommend it
Very few of the mods are “must have”. I’d rank many as “nice to have” - things like pillow block bearings, covers, lighting, corner blocks to hold glass etc.
If you are going to be printing PLA (and why wouldn’t you? it’s by far the easiest plastic to print) you MUST get yourself a cooling solution - prints will be poor quality until you do.
One popular way of doing that is to print this - Active Cooling Fan Duct v2 for Replicator 1 / Duplicator 4 / FlashForge / CTC by thruit00 - Thingiverse (in ABS) and add some wires, a 40mm fan and solder the missing FET to the circuit board.
1 Like
Awesome advice! Thanks so much! Where have you found is a good place to purchase the parts? I’ve been leaning towards ebay or amazon but would be worried about buying the wrong parts.
Ah so does simplfy 3D export the printing files ready to go or is a way of optimising your prints before slicing?
Wow that a clever way of cooling the prints. Is that the aim of the game to get the extruded PLA to cool as quickly as possible? Does blocking out the side panels insulate the heat? Do you find that it can overheat inside of the enclosure and prevent the cooling fan from working?
Sorry to sound like a newbie but whats a FET?
Bought them off Amazon. Look in YouTube for the pillow block mod and it will give you the bearing number. The extruded I just printed one from thingiverse and bought the spring at Home Depot. The pillo blocks I printed, you just have to be on top of the printer 100% of the time to
make sure it’s not getting stuck and printing properly until you have printed a filament guide and the extrduer. Do not use the provided filament guides, much better to not even use them, they provide too much friction and make the extrduer skip. S3d gives it to you ready to go either in ad or use connected.
Also, if you’re using maker ware get proftweak and look up in thingiverse Ctc nozzle calibration, it will help with over or under extrusion.
Mine didn’t come with filament guides and I’ve never bothered adding them. They’re not necessary.
A FET is a field affect transistor, it allows you to control high powered circuits such as a cooling fan with a low power microcontroller such as the ATMEGA 1280 on the ctc bizer. I can send you the link to the correct FET for a second cooling fan if you want however it is a surface mount component and can be difficult to solder without experience, especially when the motherboard is attatched to the printer
As furious007 said, a FET is a field effect transistor. Thing of it as a digital switch.
The original mighty board has an extra output called “EXTRA” which can be used to control a fan. On the CTC board they didn’t add the FET needed to complete the circuit, probably to save some money. If you solder it on yourself and add some wires you can have a fab that is switched on and off in software. This is very useful - usually you don’t want the fan for the first layer or two for PLA but you do want it for the rest. On ABS you don’t want the fan at all.
I’m printing with PETG now and I use the fan a lot for that too.
1 Like
Ah that makes sense! I would really appreciate the link to the correct one. Hmm yes I might call in a favour then with someone who’s a bit handier with a soldering iron!
Awesome will do. Cool! Whats a filament guide? when I’ve looked into it quite a few various things pop up. Is ti the tubing inside of the nozzle throat?
No. It’s tubing from the spoil to the print head. Stops it snagging at the expense of increased friction.
Z axis Rail mounts - They stiffen up the print bed A LOT and improve your prints vastly!
There’s TONS more updates I’ve done to my printer, none are really ‘must haves’, but they either improve the print quality or appearance of my printer. (I like to mod things, to both improve them mechanically/physically, and make them my own, LOL!)  I don’t currently have them all on my thingiverse profile (Thingiverse - Digital Designs for Physical Objects), but here’s a list of [most of] the mods that I’ve done to my CTC Dual:
\* Sailfish Firmware
* Z Axis Rail Mounts
* Installed the missing Mosfet for PLA fan control via the ‘Extra’ connector
* Active Cooling Fan Duct v2
* Heated Bed Adjustment [Thumb] Screw
* X-Axis Cable Chain (My remix)
\* “Sunken” LCD Bezel (better viewing angle - My remix)
\* Keyboard Cover (Prettier, and makes locating the buttons easier without having to look at them)
\* 1/4" Glass plate mount (My remix)
\* E3D V6 Hotend Upgrade + Remote extruders (My remix)
\* Y Axis Motor Standoff
\* Controller Cooling Fan standoff (reduces vibration noise)
\* Top outer corner covers
\* Inner Corner Covers
And I continue to design and/or install upgrades others have created for this printer.
Jeff
I used this one on my CTC and it worked perfect. This model is mentioned on a few of the CTC forums as a easier and usually cheaper MOSFET for the CTC Fan upgrade so I gave it a show and it worked perfect:
IRF7413 Mosfet on eBAY
Anyone can point me in the direction to print using both heads. Trying to use support filament on one side and colored on the other.