Hey guys,
As creepy as it is I will expose you to a lot of my face in this post so be warned ^^
I have been playing with two scanners :
- One is Cubify sense: It was fairly easy to set up and use and I managed to get a fairly decent scan of myself
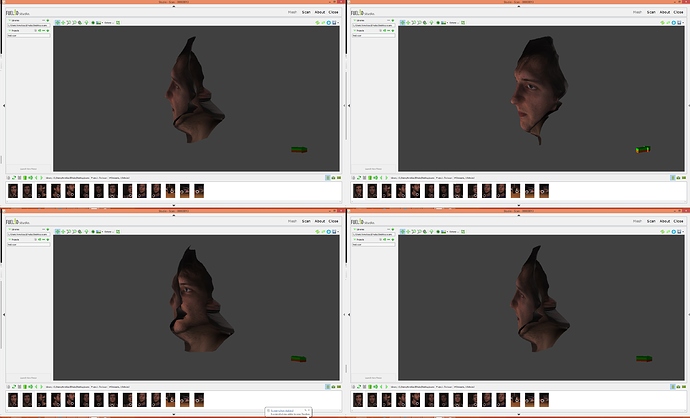
- The other one is Fuel 3D, which basically just takes a very detailed picture of an object up close.
Both of them were easy to set up and start scanning, but I get a little lost when I have to actually bring this scan to life with 3D printer.
My main concern is basically how to volumize the scan so it can be printed easily.
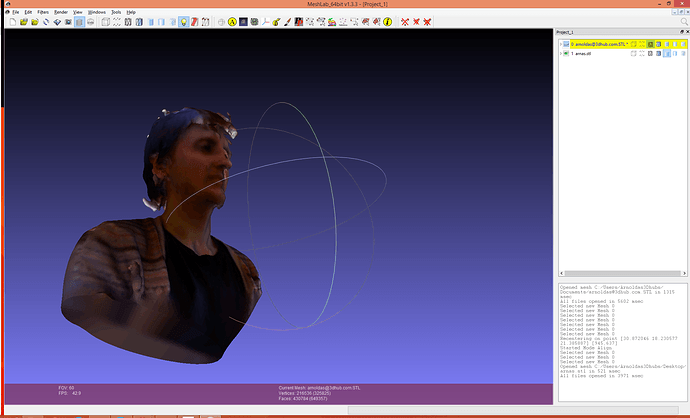
This is basically how the scan looks like and the given software has no option to help me print it. I can export it as stl, obj or ply and that’s it. (In the promotional video they show a nice software which does that in one click, but I guess its not out yet)
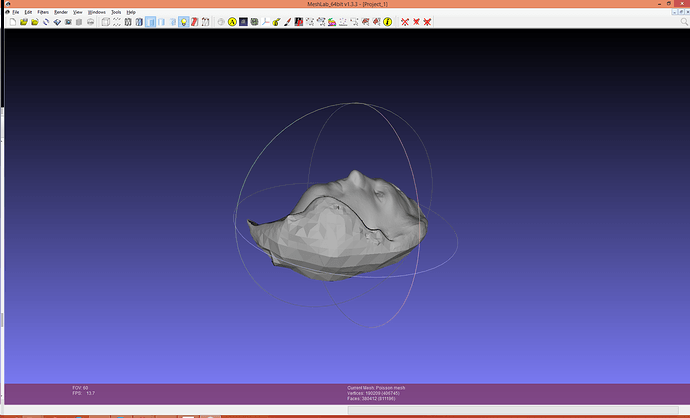
From what I have found so far I have choose to use Meshlab and volumize it there, but I didn’t manage to get it perfectly right. (Far from it)
Here’s how far I did get. It not flat at all and it destroys the face a little bit.
Even for the scan of Cubify Sense which has this option in their service it didn’t do it perfectly and I can’t come up with a way to print it.
The only thing I can think of right now is to simply upload it to Tinkercad and do it there, but there should be an offline version of software that can easily do all of this?
I’d love to hear any process that is more efficient and can bring better results.
8 Likes
Hey Arnoldas - I would recommend using Meshmixer to splice together the too. Once you align the face you can boolean union them so they become one solid mesh. You can then use the sculpting tool to remove some of the blemishes. The last stop is making it solid with the Make Solid function under the edit tab. Let me know if you have any other questions!
1 Like
Hey, Arnoldas. I was under the impression that the Fuel 3D had software that allowed you to stitch several scans together. Is that not yet the case?
If not, I’d take a number of shots with the Fuel3D at different angles - I seem to recall they say that seven should do for a head - Then import them into Meshlab and use the Align function ( Yellow “A” in a circle ) to stitch them together. You’ll need to find at least 4 common points for each pair of scans you wish to stitch so make sure there’s a fair degree of overlap.
The Sense scan doesn’t seem to be good enough for you to get a worthwhile mesh shape, although it’s not easy to see. If you’d like to send me your STL I’d be happy to take a look at it but I don’t hold out a whole lot of hope.
Cheers,
AndyL
Pot8oSh3D
1 Like
@Pot8oSH3D They indeed must have a software who could do all that according to their video tutorial that they have, but it seems like it is still in Beta or something, because I wasn’t able to access it. Maybe I should look harder 
I’ll use your tips guys and if something else comes up I’ll ask. Thank you!!!
No probs @Arnoldas. The Align feature in Meshlab can be a little tricky. Easy enough to do the alignment itself but you can forget a step and have to start again. Search for video tutorials on YouTube. Here’s a good one to start you off…
Cheers!
AndyL
Pot8oSh3D