Hi there Solidoodle owners, what have you been printing lately? Or this past week? How do you like your printers? Any pros and cons? Would you recommend them to a friend and why?
I found this video and was quite impressed with the results on The Press:
https://www.youtube.com/watch?v=28cqDyDeCPE
Solidoodle’s are garbage and the company is even worse. I basically rebuilt all of mine because factory parts are so poorly constructed. Their company can’t stay organized, is months late on shipments, and terrible quality of printers.
Solidoodle’s printers are not garbage as long as you are a tinkerer and you are willing to get your hand dirty and really learn about your machine. Solidoodle says that their printers are easy to use and affordable, but while they are not that expensive, they are quite difficult to use. Regarding the delays on shipments, I can’t argue on that because I bought my printer more than a year ago and the problems are fairly recent. The quality depends enormously on the calibration. I have a solidoodle 3; I replaced the extruder with a bulldog extruder and the nozzle with an E3D v6. And I get fantastic results! I would say that if you are sure to make those modifications, then you should go for a RepRap kit. This is the most “bang for the buck” config as long as you are willing to take the time needed. If you are more someone who wants a “ready out of the box” experience, then go for something like an Ultimaker. Of course it will be much less cost effective. If you are right in the middle, like me, then go for a solidoodle workbench, workbench apprentice or even an assembled RepRap.
1 Like
Solidoodle 2 was my first printer. I have upgraded my printbed with glass surface but besides that every part is original.
Pros:
I am printing at 30 to 50 grams/hour. So far I don’t know of anybody who prints quicker than 20.
Default extruder is able to print ABS, Nylon, PETT and even Flexfill and Timberfill.
Cons:
Extruder is hard to disassemble and clean.
1 Like
I got a solidoodle because it was the cheapest so I was thinking this might be a hit or miss, and it turned out to be really good, the customer support is good, they fixed all the problems I have encounterd, ok so the prints come out pretty good, obviously they are not going to be perfact but I got this one 2 years ago and this past month my friend got a newer dremel one and other guys got a few different brands, and my printer will still print just as good if not better than theirs, so the cons, the printbed came with a slight bow in it, shouldnt be too hard to fix, and with the open design on the 3 the prints will warp a little, but the printers have come a long way as far as I can tell when i go on their site, so I would recomend one they are a good price and work good, check to make sure the bed is level and you should be good. oh and I found a place to get cheap filiment, http://www.microcenter.com/ I have printed gears, tanks, a minigun, grenade, drone, little octopus, parts for projects, and a 3d cos graph.
I have a Solidoodle Press since 3 months and I print on regular basis. It’s my first printer and I bought it because it was the cheapest. it has been said, you should make some adjustments before fully enjoy your printer. I made a short video about all the small issues I had with the Press (Solidoodle Press review: problems solved - YouTube). All in all, I think it’s a good printer for the price I got it (450$). However, the support could be improved and most of the time google and youtube are your best friends.
I love it just because it is moddable. Recently I have been printing carbon fiber abs CF0 from Oo-kuma.com Cheers
I got a Solidoodle 2 just after the Kickstarter ~2 years ago, and for me it has struck the perfect balance between cost, performance, and ease of upgrading/tinkering. A lot of the problems I had early on have since been fixed on the current models, so the need for upgrades is lower. That being said, any printer in the
1 Like
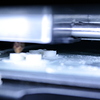
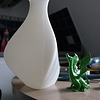
Well i manage to have quite some print with my press not so easy to use but i would say that it was a worth it printer regarding the volume, price, and the enclosure. I have still some problems but it’s probably my responsability ( bed leveling not the same everywhere ). But i can’t manage to print little pieces with overhang like marvin cause it tend to curl up see the picture )! Any idea?
1 Like
If you are printing small volume parts, you need a cooling fan blowing onto the part as it is printing. One trick to overcome this is to print several smaller parts at the same time, to give the material time to cool before applying the next hot layer.
Thanks, well, i can’t do the first option so i’ll try plan B, as you can see on the photo i tried with two but don’t make it. Already better when 4 but still not perfect
turn the temp down and make like thin rods or something at each corner with marvin in the middle and turn travel speed for non print moves down this will greatly increase the cool time
I agree, now that I look closely at your prints, it does look like you are printing hot. For large parts this is good, but small parts benefit from going as low as you can without extrusion failing. Also, from the looks of it you may be overextruding a bit. Try reducing the extrusion multiplier in your slicer and/or run the extruder steps/mm calibration. Also, try reducing the extrusion width to just under the nozzle diameter (ie. 0.38 for 0.4mm nozzle). Finally, from the looks of the curling, it seems to be predominantly on your bridges, so reducing the bridge extrusion may also help.
Unfortunately, as you can see, there are a lot of different parameters that can affect a print, so as you become more familiar with the system, and begin playing with the settings, you will be able to compensate for problems that can occur.
Nice one, Geoffrey, thanks for sharing with the rest of the community!
Indeed many parameters, but thank you a lot for theses advices it really help a lot! Your thing with the thin rod could do the trick!
I have a Solidoodle 4 and I have done a number of upgrades to it: borosilicate glass print bed, replaced carriages with Lawsy’s carriages (Look in soliforums.com or thingiverse), all belts and pulleys replaced with GT2, anti-backlash z nut, clip-on nozzle fan to cool the print, and other minor ones. I am happy with the printer but I am considering the upgrade to an E3D v6. Mostly because I read that it gives you improved quality and because it supports higher temperatures to print other materials. I have a few questions for you:
1. Before you upgraded yours to the E3D v6, did you have to upgrade the electronics (RAMPS) and power supply before doing the nozzle upgrade?
2. Can the stock electronics/power supply support the current that the E3D needs to get to the higher temperatures (about 250 degC) that are needed for more exotic materials? I want to delay doing the electronics upgrade if possible.
3. What are the benefits of the bull dog extruder compared to the stock extruder?
Thank you for any help on this!
1) No, the printrboard works fine for me!
2) Yes, I am still running the stock power supply with the printrboard. I might upgrade the power supply in the future because the bed takes quite some time to get up to temp.
3) I got the bulldog XL which sports a gearbox in order to enhance the precision of the extruder’s stepper. It replaces the old acrylic jigsaw assembly which was terrible. Nowadays, Solidoodle printers come with an aluminum extruder so the bulldog extruder is not a modification as useful as it was before. I tried using Lawsy’s design, but it was not enough for me. The bulldog extruder coupled with E3D v6 is great at printing ninjaflex thanks to the E3D v6’s PETG tubing being very close to the drive gear and the E3D v6’s sharp thermal transition.
I have two questions for you:
I bought 10 LM8UU in order to upgrade to Lawsy’s carriages.
Did you use the original rods or bought new ones?
If you used the original rods, were you able to retrieve the old pieces intact?
Thanks for the answers! I think I will
upgrade to the E3D first without upgrading the electronics.
I will stay with the stock aluminum extruder for now as well.
As far as the carriage upgrade, I followed Lawsy’s and other people’s advice and got new rods for the x carriage. I actually replaced every rod with better quality ones.
I kept the x carriage intact in case I ever need it as a spare.
The only issue with the new rods is that I have to cut them to the exact length, since every rod I found online was slightly longer than the original rods. For now, they are sticking out of the machine a little bit.
I am very happy with the lawsy carriage upgrade. The printer can run about 30% faster than before and the quality of the prints is definitely better.
I have done the upgrade with lawsy’s carriages, and I would actually not recommend them. There is a different one on thingiverse: The Remodeling of the Linear bushing for Solidoodle by ichibey - Thingiverse that I think might actually work better. I haven’t tried it yet, but it addresses some of the problems I have had with Lawsy’s design, namely the bearings not being tightly held by the parts, requiring careful adjustment to make sure there is no play. This design seems to address that with the zip ties.
As for the rods, I did use the originals, and I think I was able to retrieve all of the parts intact. The x-axis bars are the hardest to remove, but they are just superglued into the carriages. Gently torquing them should be able to break the bond. One thing to be very careful of, the stock bars are not hardened , so the bearings can damage them if you overtighten the system.
I agree about the LM8UU bearings being loose in the original Lawsy carriage design.
This is why I actually printed a re-mix of them. The ‘snap-fit’ remix of the Lawsy carriages:
Definitely a super tight fit with them. I have also seen pictures of people wrapping the bearings with tape to fit the bearings snugly in the carriages.
Once the belts are tight, there is no play. I havent had any problems with the setup.
Also, I made sure that the printer was calibrated as good as possible before printing the carriages to ensure dimensional accuracy.