Hi all,

I am at a dead end with my knowledge of fixing my 3d printer. It has been 2.5 months of trials and errors to no success. Let me tell you the short story of how my 3d printer broke:

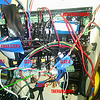
It started with a nozzle shearing off into the heater block one night when I was fixing a filament jam. I eventually disassembled everything and in the process destroyed both the heating element and the thermistor, and then proceeded to ruin the heater block when trying to drill out the sheared off nozzle.

So weeks go by and my new parts come in the mail. I get a new thermistor, heating element, heater blocks, and nozzles. After I install the new parts, I power up my makerbot, and the thermistor wire starts smoking. I turn it off. Oops too late. I’m pretty sure I fried my motherboard, because from then on, the heating element error comes up, something along the lines of “heating error, heat not detected, check wiring”. So I get ANOTHER new thermistor, and try it. This time, the wire did not overheat, but I still get the same error.

SO I buy a new mbot mightyboard (same motherboard that was in this makerbot when i bought it secondhand a year earlier). I get the same model from this link, gen 1 style:

http://store.mbot3d.com/collections/3dprinter-parts/products/motherboard-for-mbot-3dprinter

After receiving the mightyboard, I hook everything back up, all new parts. And everything starts up fine, no errors after waiting 10 seconds or so, so I turn on the heater. It starts and 20c and goes DOWN to zero. From then on, it just says 0c whenever I try to heat up my printer.

I’m starting to think I may need to buck up and buy a new printer.

Help me! I don’t know what to do! Is my 3d printer beyond repair?

Jeff

EDIT: After all the thoughtful responses, help, and answers from this forum, I still was having heating issues and thus lots of jams. Basically zero good prints were happening. I contacted Mbot directly, and a helpful woman named Robin came to my rescue. She sent me the below message:

"

Hi Jeff,
Your 3D printer should be 24 V.
I suggest you reinstall firmware. You can download firmware from this link http://1drv.ms/1TnrvRh andfirmware install instruction http://support.mbot3d.com/hc/en-us/articles/205932130-MBot-Grid-II-Reinstalling-firmware-by-USB-Cable

All is well (other than the pause and then continuing in the wrong place, rendering pausing prints useless for now on)

4 Likes

Hi Jeff,

Sorry to hear your problems, Have you tried updating the firmware, also have you check that all cables our in the correct position? Also have you tried to run it with makerbot software a viewed the log?

Cheers Ryan

1 Like

I would definitely check the firmware! I had the same temperature problem with my Da vinci and it was the firmware that had a clitch.

OK, this is a wild guess… you describe your temperature sensor as a “thermistor” but in a Rep 1 the sensing device is actually a “thermocouple” - quite a different beast. If for some reason you have this switched then mayhem ensues… And a thermistor is like a small battery so polarity matters. If you have the leads reversed it doesn’t work. Your current situation seems to suggest that may be the case.

2 Likes

Beste,

Welke thermokoppel heb je vervangen?

Dezelfde als de originele ? Of heb je de versterkte versie gestoken?

Als ik uw uitleg hoor , denk ik dat je de originele hebt gestoken. Vervang deze door de versterkte zn je probleem is opgelost!

No positive on a Replicator 1, but I ended up in a similar situation when I replaced my motherboard in one of my Replicator 2’s. In my case, I was getting the same error after hooking everything up the exact same way as on the previous motherboard. It appeared as if it was looking for another extruder to heat. Apparently the motherboard had been flashed with settings for a 2X that has 2 extruders. I went into the settings in the menu and set it to only one extruder and no heated build plate and instantly the numbers showed up correctly and the extruder heated just as new.

Again, I’m not sure if this makes sense at all on your machine, but that’s the story with mine. I wish you the best! Worst case, there are some great deals on Replicator 2’s on ebay right now.

You weren’t completely clear on whether the print head was not heating or the print bed. Assuming you have hooked things up in the print head correctly, it almost sounds like your heated print bed is causing problems. Look at the connector on the back of the print bed and see if there are black/burn looking marks on the left pins of the connector. This happens often and can lead to all sorts of problems. You can get error messages on the screen, the mighty board can blow a component. Mbot sent me a new heavier duty wiring harness the first time this happened. It started happening again and I removed the connector from the board, sanded the pins, put some conductive grease on each pin, also removed the pins in the connector, cleaned them as best I could, greased (carefully) and reinserted. Plugged everything back together. Put a piece of kapton tape over the connect to protect everything from hair spray which I use for adhesion and it has worked fine since then.

it’s not a thermistor… it is a thermocouple… (red and yellow wires)… and you have connected them in reverse.

Hi there,

Sounds like erickphd is right. When the temperature goes down after calling the heating cartridge to heat you should switch the leads on the thermocouple.

Do you check the thermocouple cable in the right place? We’d had a lot of problems of temperature errors until we found the right position of the thermocuple cable.

Good luck!

I’m really impressed with the work you’ve put into it so far. Good job.

If the temp is going down you’ve put your thermistor wires backwards at the motherboard. Just switch the thermistor wires on the motherboard and it should go fine.

Hey, don’t give up after all this. You’re doing great.

The thermocouple is either shorted to the heater block or connected backwards at the motherboard. Try swapping the wires in the connector but also make sure the thermocouple is electrically isolated from the heater block. A good way to do that is a couple layers of kapton tape, the same type that comes with the makerbot for the print bed. If you have an ohm meter unplug the thermocouple from the motherboard and check both leads for continuity to the heater block and also make completely sure neither of the heater wires are touching the heater block. The first one probably smoked because the 24v to the heater made contact to the heater block and then went down the thermocouple wires. The original board is probably still repairable, I’ve fixed a few of them now, it usually blows the chip on the board that is used to interface to the thermocouple. Hopefully you haven’t killed the new one yet! First step though check for shorts and swap the thermocouple wires in its connector block, the green block that you tightened the wires into and plug into the motherboard. If your still seeing the same problem chances are the chip was damaged. The Rep 1 is the best makerbot made in my opinion, I have over 2300 hours on mine with only a few minor issues. And I can repair these motherboards, I’ve fixed at least a dozen now with blown chips. Do you still have the old motherboard? If you get this one working with the stuff I told you to check I would offer to look at your old board to see if it can be repaired. Then you would have a spare, replacing the chip and usually one surface mount resistor fixes it and parts and labor I do these all the time for far less then the cost of a new board! Definitely not time to replace it, but if you decide to go that route let me buy it for parts or repair! Lol I hardly ever see a used rep 1 for sale, seems like those who own them never want to sell them! I’m always watching eBay for another one to fix up.

Also one other tip I didn’t mention in my last post. Never try to replace a nozzle cold! Always do a preheat and remove the nozzle hot. Trying to remove it cold is a guaranteed way to shear one off! I bought a metric nut driver, looks like a screwdriver, for the nozzles. Then if I have to remove one I do a preheat screw it right out and set it on a piece of metal or the sponge for my soldering iron. It’s a pain to work with them hot but you won’t damage one or the heater block.

Hi Jeff,

Sounds like it may be an issue with switching the red and yellow thermocouple wires around, try reversing the order and hopefully that works! Good Luck!

Diana

Jeff,

Your original board can be repaired. I have replaced the MAX6675 chips on my mighty board from time-to-time due to a shorted thermistor.

Regards,

Mike

Wow! Thank you everyone for the responses!

SUCCESS!!! I have reversed the *thermocouple the wires, and the printer now heats up! It goes to 215C like i set it and now holds.

Onto the NEXT ISSUE…I cannot get my makerbot to do anything else really. It doesn’t go to home axis, doesn’t load filament (even though after the temperature goes up to 215c and the screen changes to say “press the m when the loading is done”), doesn’t move in jog mode, and so on and so forth. Could this be the case of my wiring being wrong again?

I originally labeled all the wires with tape and marker before I removed my original wires from the original board. I referred to an image I took of all these wires in place, and I replaced them based on my image. I guess I assumed that putting the wires in the same spots on the same model mightyboard would be a common sense thing. Guessing may not be the answer on my end, seeing as it has gotten me to basically cross my wires! haha

See attached image

Its hard to tell from that picture but it appears that your stepper motors are all plugged in, follow the wires and just make sure the motors are plugged in right, the board is labeled, X, Y, Z for the steppers. X is the motor that moves the carriage left and right, the Y is the motor that moves it front to back and the Z is of course the bed going up and down.

Also if none of the jogs move it could be your stop switches, try moving it so the carriage is in the middle and then you know the switches are released and see if you can move it with the jog. You could also have the stop switches plugged in wrong depending on which style of connector yours has, seems like the earlier Rep 1 some had a keyed connector some didn’t, you could unplug all the stop switches and then see if jog works, but that wouldn’t stop the filament feed motor from running.

One more thing comes to mind, did the board come with the stepper drivers installed? The little circuit boards that are plugged into the motherboard by the stepper motor connections? If you had to install those and none of the motors are working you could have them put in backwards, but if they came pre-installed on the board then they should be correct.

EDIT>>> I just looked at the pic again, none of your stepper drivers are installed, the sockets are empty! Theres your problem.

Again SUCCESS! My Makerbot Replicator 1 now works!! Wow you all have been so helpful!

I did a test print and everything is good except when I got done with my first test print, the bed lowered and the extruder moved towards the home axes. When the bed got to the bottom, it started making noises like it was trying to go further down than was possible for its track, also, the extruder hadn’t quite made it back to the home axes and just stopped due to the bed making noise and then stopping itself. It sounds like the offsets for the bed are below what they should be, but I am not sure how to update this.

Any advice?

Go into the Utilities menu on the printer, select Home Axes from the menu, see if it moves the carriage to the back right and stops against its switch and if the bed comes up and stops against its switch ok, if it does do that ok the bed will stay up, now back up in the menus and go to Build from SD and select your test print again, the bed will lower to the bottom and the carriage will go to the front left corner. Does it still make the noise with the bed when it goes down?

If so then it thinks its range of travel is larger then it should be BUT the switches are working since it was able to home the axes. The best bet now would be to connect it to the computer and run the makerbot desktop software and make sure the printer type is set to Rep 1 and then do a firmware update to the latest version, the makerbot desktop software will tell you how to do it just follow along. The current firmware version is 7.5, you can check this on your printer by selecting Info and Settings, then Version Number. Even if its 7.5 in there i would reflash the firmware because there is no telling what the new board was setup as, they could have the offsets wrong.

After the firmware update do the same test, home the axis, then select a print, does the bed work ok now? If it doesn’t the next steps would be to check the Z axis stop switch, top middle of back of the printer, If the switch is set to low then it will trigger that switch and still think it can do down farther then it can, moving the switch up moves up the lower stop position. On mine and most of the ones i worked on the the switch was attached with two screws to the vertical slots, there is other holes to make the switch a fixed position and thats how they generally came from the factory, but by moving the switch to the slots you can control the stop point by moving the switch up. It sounds like its trying to keep going down when it physically can’t. The reason for this is after it taps the switch it knows it can do down X amount of steps before hitting the end of the travel, if the switch is too low it will still think it can keep going.

As for the carriage for the extruder not making it all the way home, did it go all the way back but not all the way to the right? This is a common problem due to interference between the stepper motor wires and the X axis stop switch located on the right end of the gantry. The X axis motor and the X axis stop switch wires go down the hole in the front right corner, to alleviate this problem what most people do, myself included, is move the X axis stepper motor wiring to the back right corner hole along with the Y axis stepper motor wiring so only the X axis stop switch wiring is going down the front right corner, this gives them some separation and keeps down on the crosstalk between the wires.

Well, here’s the thing. I tried uploading new firmware, and I followed the steps from here:

http://www.sailfishfirmware.com/doc/install-installing.html

I could not upload new firmware. I select the replicator 1 single/dual, and try sailfish 7.7 but it always says “upload failed”. Now ever since I have tried this, my replicator is unable to print again.

When I print from SD, it heats up fine, and then it goes to the front left position, but it tries to move too far forward and makes a jolting noise, then gives up and moves back to the *near home axes. It is like the replicator pauses the print, moves the carriage back all the way in the y direction and part of the way to right (x axes right?) but not all the way home. And when I resume the print, same problem. The jolting of the carriage continues. EDIT: I FOUND THE P-STOP OVERRIDE AND I TURNED I OFF. I NO LONGER GET THE CARRIAGE JOLTING ALL THE TIME (STILL HAPPENS OCCASIONALLY. THIS IS ALL WITH THE MIGHTYBOARD FIRMWARE THAT CAME INSTALLED ON THE BOARD)

**NOTE: the bed problem of it trying to go further down than it can has mysteriously gone away and has been replaced by the carriage issue I mentioned.

I am proving to be quite amateur with all this, but I am determined to get it right!