Hello everyone! I’m on a printing-spree here  I was browsing through some older personal projects of mine. Though this one would be cool for some model-builders amongst us.
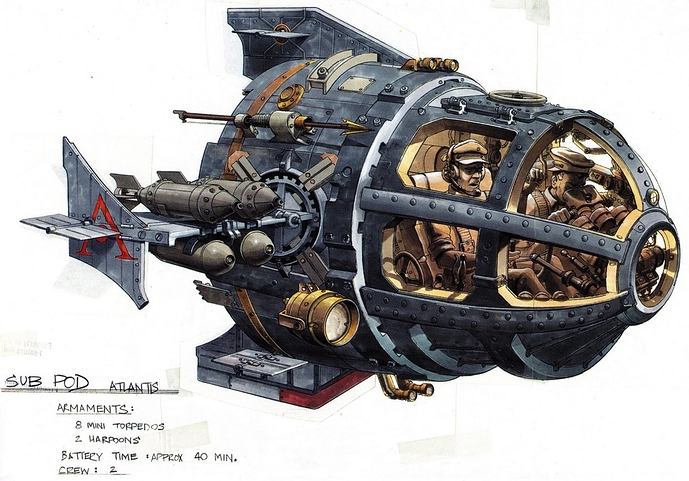
While getting some inspiration on Pinterest I came across this concept sketch of a Steampunk-looking submarine. I always like concept art, mostly because it doesn’t see the day of light in production and I find it a challenge to create it in 3D and even more: print it! How cool is it to have something in your hands that was actually just conceptual!  Anyway, apparently this piece of concept-art is from the animation movie “Atlantis” by Disney. I really don’t know who designed the concept so I can’t give any credits to it. I took it upon myself to see if I could actually model this in 3D and have it printed in detail.
The concept drawing that I found…
At that time I owned a UP!Mini 3D Printer, fairly good printer for it’s specs. I always print on the highest layersetting which is 200 microns (0,2mm) and the build volume is rather small, 12x12x12cm’s. With this printer you can’t print on the edge’s so I always take a few milimeter’s of to be safe. I always print with ABS Plastics, the manual says I can do PLA but trust me, you can’t. I tried it once and although I did succeed with one nice print in PLA, the second try ended up with my extruder-head in the oven and pulling out a strand of PLA… So ABS it is!
Designing
Main purpose here was to see if I could brush up my modelling skills in Zbrush and model the whole thing with that software. Zbrush has (or had these days maybe) the reputation of being a bit difficult if it comes to do some hard-surface modelling but it can be done. Pretty good actually. I didn’t have any side-reference pictures or anything so I had to eyeball this one.
I also had to come up with some ideas of how I was going to model and print this. Once again, you really have to plan ahead. What parts are going to be part of some main objects and what will make really separate?
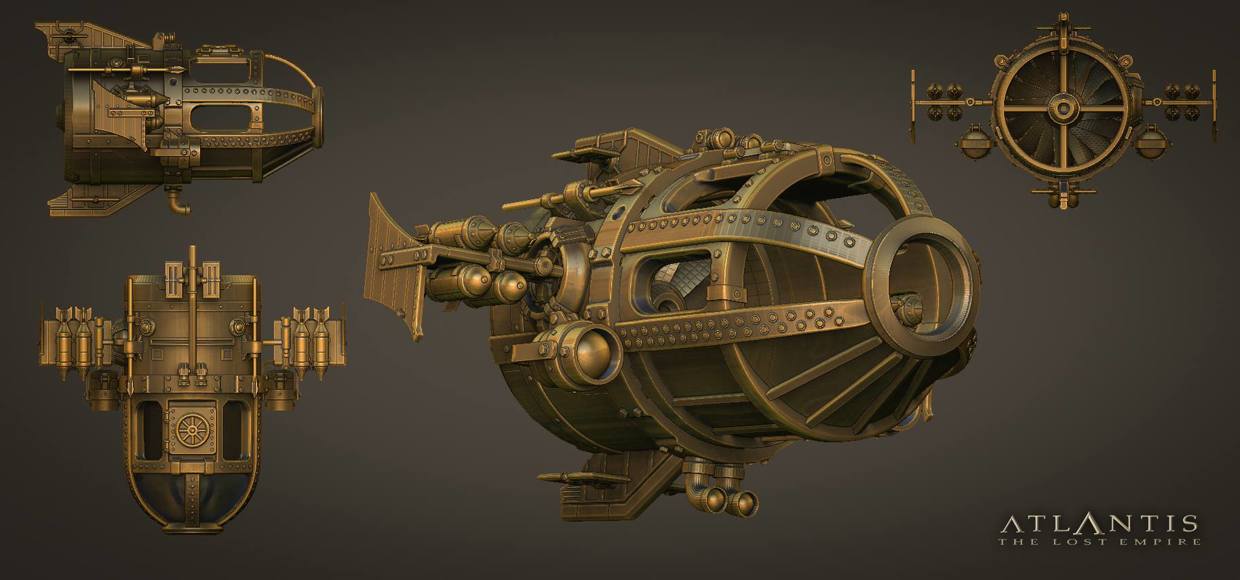
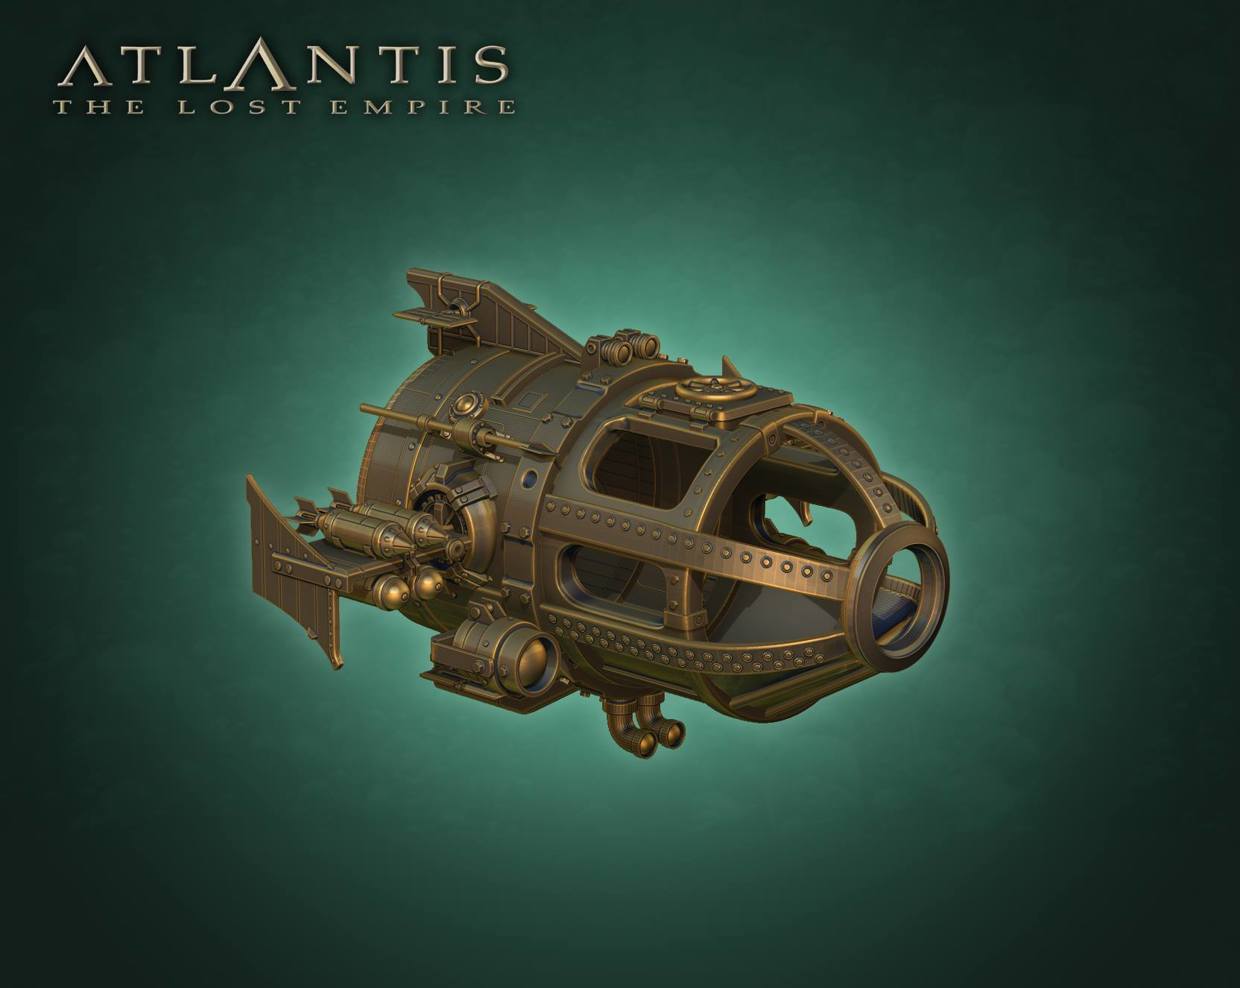
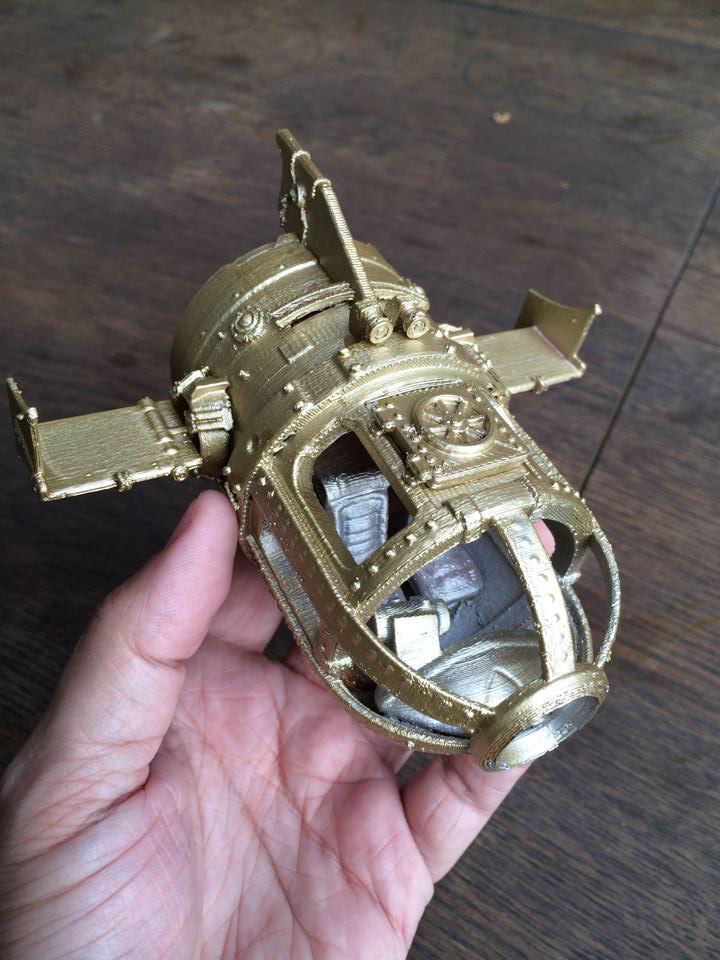
Some views on the final version of my model…
Taking my printing resolution in account, I can’t go that detailed. For example, I wasn’t sure that the “spear” on the side of the main body would be printable as with the “missiles” on the wings. I decided to create and print most objects separate so I could print it in a bigger size. A quick tip on this is just to check what part is going to be the biggest to print. Everything else will be surely printable as it is smaller.
In this case I wanted to do the main hull of the sub, with the window archs, as one object, mainly to have it at strength. The back engine part I would do separate. So I printed the main hull upwards on my printer so it would come out as smooth as possible (with this printer though…). So all the wings, fins, engine, missileparts, periscopes would be separate. On top of that I modelled some interior with chairs and console/steering housing.
Final version of the model…
Printing
So after a few days of modelling off and on, I finished everything and made everything into separate objects. I used a subtraction technique (see my project of creating the Aliens-egg) to quickly create keys and holes to the fins and wings and some other parts, so I could snap-fit them into place and have it glued.
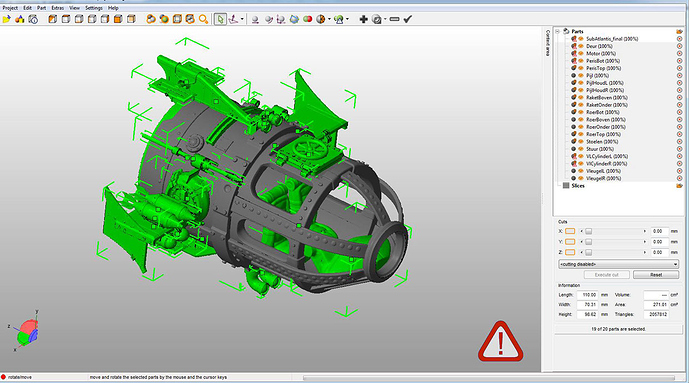
Printing it was fairly easy. I had every part loaded into Netfabb (my weapon of choice for checking, scaling and fixing models), checked everything and eventually scaled the main body to accomodate the buildvolume of my printer. Every other part would easily scale with it retaining it’s relative proportion. I exported everything out and fired up my printer. Most pieces were relatively small, so printing most of them took about 1 to 2 hours per object or sometimes I did multiple objects at once. The hull was the biggest as was the backengine part. This took a few more hours more. I did calibrate every 2 prints just to be sure and have the best prints.
Checking in Netfabb
Assembly
Cleaning up everything, the support printed comes off without resistance, it’s magic! Firstly I try to see if there’s warping and if everything fits as it should be. I didn’t make the holes or cuts slightly bigger this time, I really wanted a tight fit. I had some good plastic-glue (Bison brand) lying around (which REALLY sticks…at one point I thought it actually melted the plastic of fused it somehow) and that did the job of holding it together.
Finally I spraypainted it whith Gold (cheap brand from the Action store ) the original plastic color was Pink by the way, so I really needed to paint it Only quirk with painting is that in some case the printing-layers will stand out a bit more. Time to save it for something better!