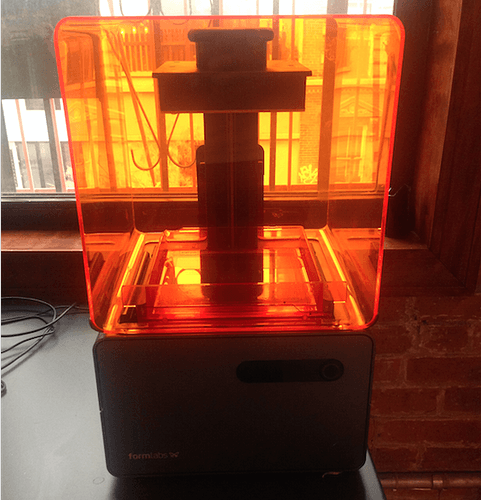
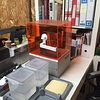
We’ve been doing regular printing with the Form1+ in the NYC Office and overall its been a good experience. Their FAQ is very well documented and answered many of my initial questions. That said, I have gone through some trial and error with improving my printing process beyond the initial setup. I thought I’d share some of the tips and tricks I’ve come up with and see what everyone else has been up to on the ‘Hacks’ front.
My first tip involves avoiding the messiness.
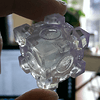
The resin has a tendency to get in unexpected places. After some proper planning and setup this is easily avoidable.The finishing station and gloves are crucial. I rarely use the holding block for the build plate when removing the base of the support. I put it up against my chest to get the right angle with the chisel. An apron is especially helpful here. I honestly don’t mind the post processing and handling too much - it adds a mad scientist vibe to the work. For the alcohol bath - I find 70 % IPA works fine.
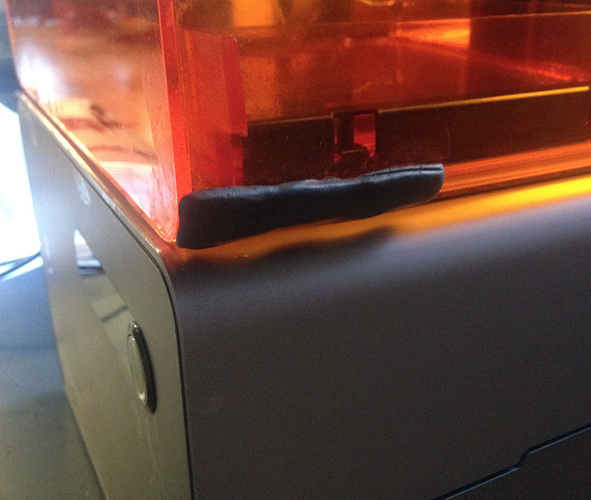
After accidentally getting streaks of resin on the Form1+ acrylic casing, I made sugru ‘grips’ to easily lift the casing up without getting resin on the acrylic. To get the grey, it was one white and one black packet sugru mixed together. It works surprisingly well and doesn’t mess with the overall aesthetic too much.
Vat Tricks
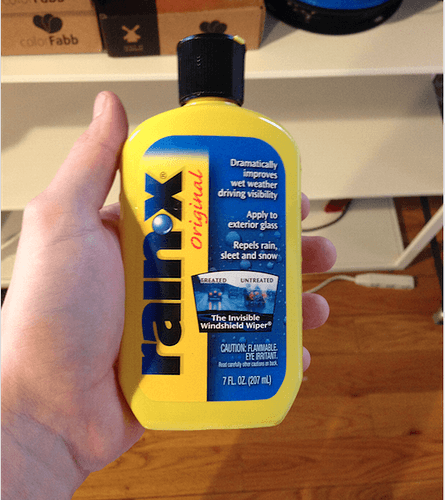
There’s also a couple neat tricks you can do with the Vat. Based on a tip from the FormLabs forums, I decided to add a coat of RainX to the layer of silicon in the tray. From my understanding, this reduces the chances of failed prints and delays the clouding. I haven’t been testing it for very long, but the initial results are positive.
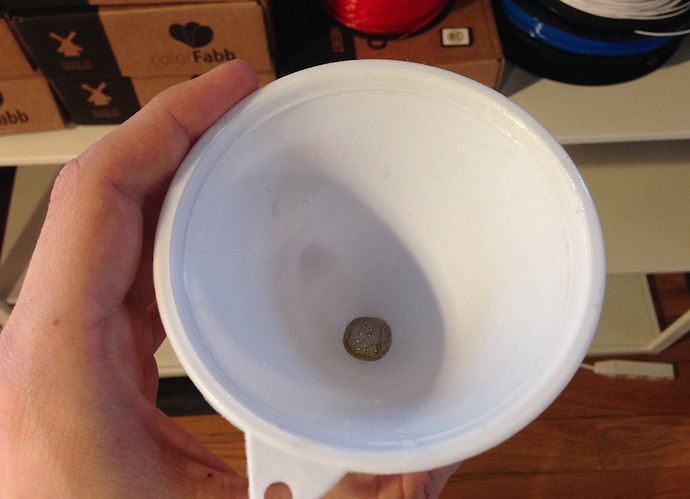
I also clear the resin after every 5-6 prints. It’s easy to miss some small particles if you are just eyeballing it. I use a funnel with a pipe filter for this. If anybody has a better solution here, please let me know.
Supports
Support removal is an art in itself. This is true for both FDM and SLA machines. Removing SLA supports is still a bit of a hassle, but with the new PreForm software update it’s now much easier, and the automated supports now use less material. Definitely wear eye protection when removing supports, sometimes they fly off in random directions. When I have a significant amount of support, I’ve found that cutting into the base is a good way to clear the material to get to the hard to reach supports.
These are the biggest tips and tricks that I’ve come up with to take my Form1+ printing to the next level. There’s still room for improvement on my end and I’d love feedback. What are some tips and tricks that everyone else has experimented with? The vibration clean up tool from last week was really interesting.

12 Likes
Hey Alex, thanks for you insights!! Could you add some more description to the filter process with the funnel? Do you have some sort of sieve at the end of it or do you just filter out parts bigger then the “funnel tunnel”?
Cheers!
Simona
4
Hey Alex, thanks I’ll show this to the Formlabs guys tonight in Berlin 
I use paint strainers purchased from Home Depot to strain my resin. Easy and disposable.
1 Like
A couple more tips:
Before print:
1) Use the chisel to move along the tank bottom, letting the silicon coating breathe air a bit.
2) If you use colors (grey, white, black etc) make sure to stir it a bit so the pigments are distributed
Post processing the prints:
1) Easiest way of removing the print from the bed: put the chisel into a notch, lift the chisel up, applying a lever force inside the notch. (You will hear a *click*) Do this for a couple notches and it will be really easy to remove the print without the need for excessive force, an apron, a hammer or the platform holder.
2) Fastest way to get excess resin (the sticky stuff) off: I use Acetone instead of Isopropanol, it’s much faster. Dump the print for 10 seconds into Acetone, then use an paper towel to wipe it off, repeat. CAREFUL: The Acetone will make the print very soft if you apply it for too long or you have a print with very small features / thin walls!
Preform:
1) Most of the time Preform adds too many supports, remove some, as long as it doesn’t mark the area red, you usually fine
2) the default support point size depends on layer height, but it’s usually too large. I found point size 0.4mm for 0.1mm layers or 0.7mm for 0.2mm layers to be just fine, and much easier to get off.
Post curing:
1) I use a light box with 10m of UV light strips (approximately 25 Watts) and found that 1-2minutes in there will post cure the print fine. Don’t leave it in there to long or cracks will appear!
2) always coat your print with an UV blocker/Spray coat immediately afterwards or it will continue to cure and over cure. (getting brittle, deformed or cracking)
3 Likes
I use a hot knife to remove the supports. It’s a razor blade attached to a soldering iron. It tends to be better at reaching the harder to get at supports.
2 Likes
Hey Guys,
I use my hand palm to open the acrylic hood (yours look real dirty alex, how do you get so much resin on your baby…)
For the resin filtering I use paint filters from my local car paint shop works like a charm. About cleaning up parts I asked brc international (isopropanol producer/importer in holland) for a method to filter the isopropanol because its depleting absorption over time. The offered me to test with ethanol, the molecules are a little, little bit different then the isopropanol but its half the price! So I will let you guys know how it works when I tested it…!
About the form 1 finnish kit it’s ok, but for integrate parts and models it’s not working for me… I bought an industrial ultrasonic cleaner digital programmable and I am really happy with it. 2-4 minutes in isopropanol and then rinsing them 2 minutes in the same sonic cleaner with only water and the parts are super clean i recommend a professional ultrasonic cleaner (the home brew is fun for diy project) but if u want more functions and us it right out of the box the profesional ones have other cleaning functions or heating functions and you can do a lot of other things with it. mix substance, clean parts or jewelry and so on!!
i was also curing my prints with uv lamps after printing but since i bought the ultrasonic cleaner i see no need to do this, especially because the (clear resins degrades and yellows after exposure of uv a-b coating, to preserve transparency and color UV blocker/Spray is a must
Regards,
Marcel
2 Likes
Hey guys, great Talk!
the only thing I have to add is for post processing, sanding the remainders of the supports and then using the mineral oil as described on the Formlabs FAQ is actually really effective. It gets rid of all the white traces without any trouble. It’s especially effective on the clear resin, it makes the print actually clear as if it just came out of the alcohol.
I hope this was useful to some of you.
Best,
Robin
CtrlP
10
I use IKEA STUGVIK toilet roll holder as a handle to life the cover, works great!
Hey there, we can now suggest another tip for the form1. We have developed a convenient way to replace a cloudy silicone layer of your resin vats. Have a look: Talk Manufacturing | Hubs
or support us on Kickstarter: DruckWege ReCoat by A+F Engineering — Kickstarter
Cheers!
Visit http://www.restorasonics.com for the best price in 3D Printing ultrasonic Cleaners 10% OFF, Mention you seen this ad and receive 15%OFF