If I make my delta printer print a cube 10 mm tall, 10 mm wide, and 10 mm long, it will print a cube 11 mm tall, 9 mm wide, and 9 mm long. Help?
2 Likes
You have incorrect values set on the Arm length, every dimension for a delta printer is calculated based on several dimensions.
Is it a commercialy available printer? you should have recommanded values I guess.
Here is a good guide on how to tune perfectly a delta printer : http://minow.blogspot.fr/
Wish you luck 
1 Like
As detailed here: http://minow.blogspot.nl/
- Build it right! Accurate dimensions are far less important than symmetry. The towers must be parallel and equidistant. The six diagonal rods must all be equal in length.
- Turn off EEPROM and auto bed leveling when tuning.
- The only firmware tweaks that are important are steps per mm (which controls general X and Y movement, and Z height), DELTA_RADIUS (which controls “flatness” ) and DELTA_DIAGONAL_ROD (which controls X and Y dimensional accuracy). Set and tune these values in this order.
- I see a lot of conversation about carefully measuring DELTA_SMOOTH_ROD_OFFSET, DELTA_EFFECTOR_OFFSET, and DELTA_CARRIAGE_OFFSET. These only matter when starting to dial in DELTA_RADIUS. Use them as starting information. See #3 above. After all, what matters is that the printer is printing flat and accurately in X,Y, and Z dimensions.
- Tune the firmware so that the printer prints correctly. Tuning firmware to match the (presumed) "as built"measurements of the printer is not the fast-path to a smooth and accurate printer.
- Only turn on EEPROM and auto bed leveling when tuning is complete.
2 Likes
Hah, great minds think alike. That blog has the best description of how to tune a delta. 
1 Like
The delta is quite complicated system, and your errors are related to wrong dimensional data of the arm length. If you will be able to get a quite correct size of cube using Clément_1’s link than you try to print an object 100x100mm and measure it.
If its still out use this link to solve the problem, maybe one of your arms are longer or the towers are not in the correct position,
luckily all this can be corrected in the FW.
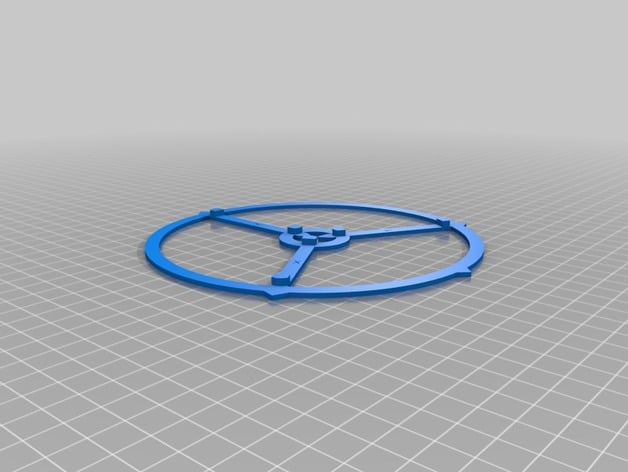
http://www.thingiverse.com/thing:745523
1 Like
Haha, few minutes appart ^^.
You must have been writing it at the same time as me, but my message was shorter 
Have you checked your delta geometry ? here is a quick list of things to double check:
- Are effector rod sets completely parallel ? (your carriage and effector distances should be bang on)
- Are effector rods exactly same lengths ? This is pretty critical
- If above is right, check your firmware setup and force rod dimms (i.e. when you do your printer auto calibration make sure it does not adjust rod lengths as well).
Hope this helps.
Taede
8
First start by calibrating your DEFAULT_AXIS_STEPS_PER_UNIT. If your object is 11mm in real life instead of 10mm, then this value is wrong.
The height of the object is directly determined by the steps per unit for the carriages, no other parameters do influence these. So check the timing belt and the pulley on your stepper motor and set the correct steps per unit.
I am using a GT2 belt and a 20 teeth pulley on a NEMA 17 stepper motor
nema17 = 1.8 degrees per step (200 steps per revolution)
stepper driver microsteps default = 16 (16 microsteps per step on the stepper motor)
microsteps per revolution = 200x16 = 3200
gt2 belt = 2mm pitch
20T pulley = 20T per revolution => 20Tx2mm = 40mm per revolution = 3200 steps
steps/mm = 3200/40 = 80
Thereafter further calibrate the printer, my calibration object including explanations for advanced calibration might be helpfull
1 Like
Sometimes we knowledgeable people tend to over talk, and make things more compicated. Plain english, in case what these other good people said didn’t make since to you. Two things you need to do:
1) Properly adjust your steps per mm to make sure it prints at the CORRECT HEIGHT. All three values for x, y and z MUST remain equal. Do a test print at this point. Yes, your x and y dimensions will be off. We’ll tackle that next.
2) Adjust the value for the length of your arms, until you’ve properly printed the correct size in the x and y. Do a test print.
Note: Print the 10mm cube instead of a large item. You may go through 3 or more prints. This will still be accurate, and also cut down on calibration time.
A cube won’t tell you much about the triangular construction of the printer. Re-print a prism shaped object. It doesn’t have to be a solid prism. I saw floating around the internet an excellent test print for checking delta geometry.
Basically though, the only reason a delta would show a problem like that, is due to either being built wrong or having inconsistently manufactured components. If some of your delta arms are slightly longer/shorter. If your towers are spaced strangely, etc, etc and so forth and so forth. If you take apart and re-build it only to find you still have problems, I’d recommend using the google group’s marlin firmware with delta auto correction.
Every delta, by definition, will be inconsistently manufactured as compared to the values in the firmware. There’s nothing wrong with the construction of his printer. His parts are simply deviated slighty from what would be assumed “perfect”. As far as the print you choose to calibrate with, it doesn’t matter. If the printer is configured wrong, it will print ANYTHING off spec. 20mm ,is 20mm… whether it’s on a circle, square, cube or banana.
Yes, agreed. And I stated, either bad construction OR off-spec parts.
While you are correct, that improper configuration will print anything wrong. However, it’s so much easier to identify specifically what’s wrong using a calibration part oriented around showing deviations aligned with each tower. Heck, printing a 6-sided symmetrical snowflake will point to the tower where the deviation lies.
gsnover
14
First check that your motors steps per mm are correct. It could also by you arm length parameter.
from delta [smoothieware.org]
'Set arm_length to the length between joints of the arms. An incorrect value for arm_length will affect the scaling of movements in the X-Y plane - printed parts will come out smaller (arm_length needs to be reduced) or larger (arm_length needs to be increased) than intended.
Salve
devi modificare i parametri del firmware che hai caricato.
ciao
My Kossel Mini from Builda3DPrinter.eu is correct in the z axis in height, all movements that are 10 mm are 10 mm, but, x and y movements are half what I say, 5 mm instead of 10 mm. I have used the manufacturers specs. and did my own measurements to check. I also still have issues with leveling the bed, I am using Repetier Firmware and it isn’t working.
Hi,
On a fresh assebled Prysa i3, i had the same problem only in Z Axis.
An object high Z = 230 mm in Repetier - Slic3r
was printed only 130 mm high misured with calipper.
So in Repetier menu /Config/Firmware EEPROM Configuration, i recalled the EEPROM table end i modified only for the Z Axis, the default value “2560” to “4529” after a simple matematical ecquation.
If the “2560 steps per mm” prints the object 130 mm high, how many (S.p.mm) “steps per mm” shuld i use for a 230 mm high printing?
S.p.mm = 2560 X 230 / 130 = 4529
than i saved the modifated to the EEPROM
The next printing was high exactly Z = 230 mm
----------------------------
any way i think that the Taede’s http://www.thingiverse.com/thing:745523 , is a gran tool!!