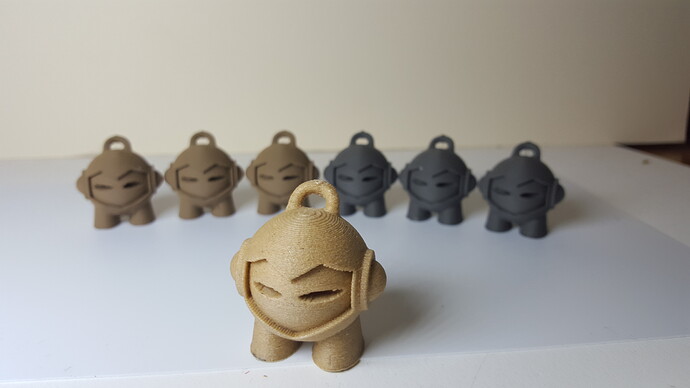
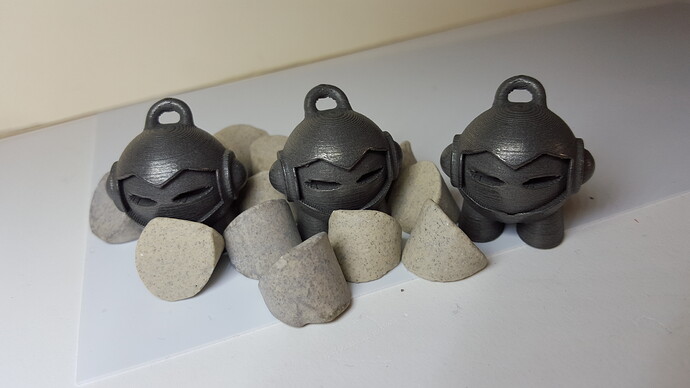
So this is partly a “follow along” of Marvin watching over filming of polishing some ColorFabb and Proto Pasta models for my next part polishing video. This time we are going to be using Marvin at 125% scaling in Proto Pasta Stainless Steel and ColorFabb bronze fill. Today was spent just making the models up as I am waiting on some ceramic tumbling media to ship from Washington State. Hopefully it will make it here end of this week beginning of next so we can film.
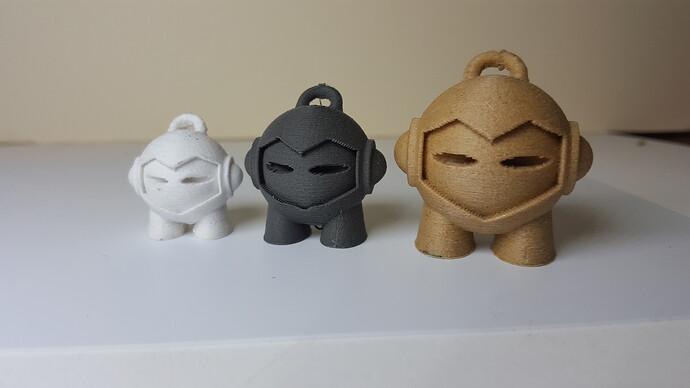
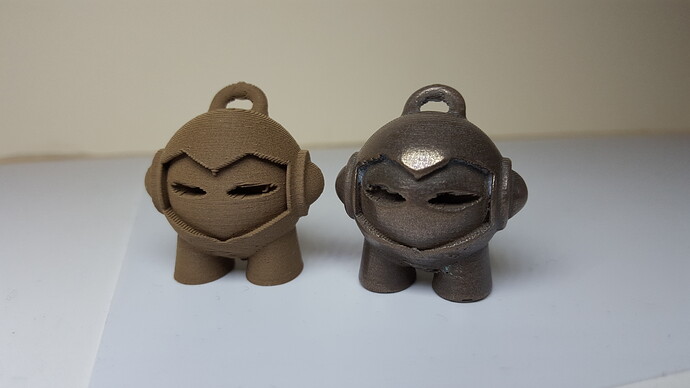
Also we have a size comparison of the Marvin’s. White Marvin is 100%, Stainless Marvin is 125% and Wood Fill Marvin is 150%.
Check back regularly as I hope to update this post as more filming gets done. So far nothing can be done until my smaller media arrives!
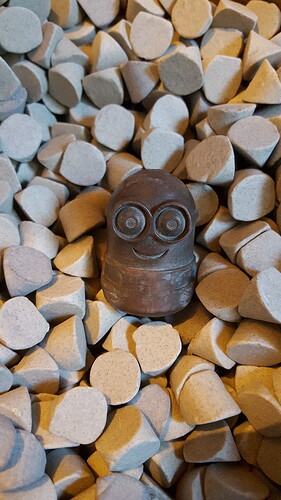
Update 1: The media I have tested with currently is some massive ceramic media intended for tumbling steel parts smooth. While this is great and actually quite effective on metal models it is also incapable of reaching into tiny areas very well. Here is a test tumble with a tarnished ColorFabb Copperfill model before and after. The model was waxed post-tumbling for about 24 hours but the color difference is huge!
One drawback to a tumbler is the price/time. For the setup I run it would set you back about $160 for the tumbler. The Thumblers Tumbler AR-12, while it will set you back about $180 > $200 I have no complaints with it. A large capacity + capability to run for days on end without worry is ideal! The other main drawback to a tumbler is the time. While it can take me say 20-40 minutes to polish up a small item the time required for a tumbler is measured in hours > days. On average I let a model tumble in ceramic media 24 - 48+ hours, or until I like what I see. Then I switch to a stainless steel pin media used for brass reloading and let that run another 24 - 48 hours. So while the process is autonomous it is time consuming and has somewhat of a high startup cost.
While a tumbler of the capacity of mine is not necessary, it is helpful to get the largest you can. That said a small tumbler is great if you only do small parts. No need to pay more for what your not going to need! So while a tumbler maybe somewhat expensive starting out, they are very useful if you find yourself needing to finish mass quantities of prints and you don’t feel like sitting there and sanding them for hours on end. Also tumblers can reach into areas that maybe difficult for hand sanding. They will not handle fragile models well so keep that in mind!
Ok last update on the models for now:
Preferred polishing process for the Stainless Steel:
Tumble in ceramic media for about 24 hours
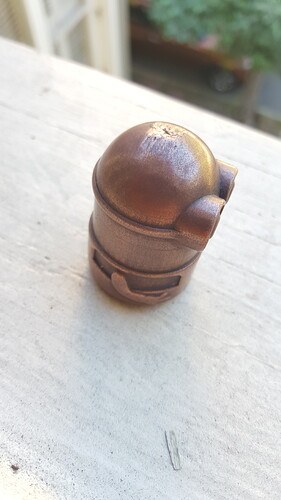
Switch out for stainless pins and tumble with a little water for about 8+ hours (models were tumbled 8 hours as shown). The photo doesn’t do the models justice for how glossy they are. There was no polish on the models. I found the ProtoPasta stainless steel was the easiest item to polish up.
Preferred polishing process for the Bronzefill:
Sand the model semi-smooth with coarse sandpaper to remove any rough patches/remove the layer lines. This is critical for polishing!
Tumble in ceramic media for about 24-36 hours
Switch out for stainless pins and tumble with water for another 24+ hours
Rub model down with a t-shirt rag and Mothers Mag Polish http://www.mothers.com/02\_products/05100-05101.html I found Brasso did not work well!
Remove all the old polishing compound from the model. This is critical OR the model will turn white and haze up…
I then vigorously rub the model down with a clean t-shirt rag and NuFinish car polish Once A Year Car Polish® | NuFinish. I find this helps to give the model a final buff and remove any leftover polishing compound left on the model.
The reason why removing the layer lines is critical in my opinion is they trap the extra compound and it leaves the model hazy. I will try removing the excess compound with Odorless Mineral Spirits but I do not want to remove any wax left on the model from the compound.