Photogrammetry and light scanning

3D Scanning, like 3D printing, is a broad term that describes many different processes and applications. I’m starting a short series on Talk to discuss all the basics of 3D scanning technologies, relevant for 3D printing. I would love to have your feedback and comments, so we can make it the best 3D scanning series of the internet! Let’s go :slight_smile:

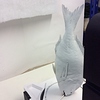
3D Scanning technologies allow for the creation of of 3-dimensional objects. By using 3D scanning you will be able to capture a digital copy of a physical real world object. To exemplify the extent to which 3D scanning will have impact, imagine for example the reconstruction of a severely damaged human skull, that was scanned and replicated in titanium. Or the fact that we can digitize cultural heritage and art, making it timeless and immune to the effect of wars. Moving forward, one can imagine a world where basically everything has a digital counterpart. A world where the difference between physical and digital no longer exists, where VR is just as real as anything else. Things can get crazy.

Now let’s get practical. For 3D printing, there are roughly two relevant techniques of 3D scanning:

  1. Photogrammetry
  2. Light-based scanning

Photogrammetry

Photogrammetry is the easiest way to get started in 3D scanning. The method is based on taking 2D pictures around an object, from different angles, and stitching them together into a single 3-Dimensional image. The last part being handled by software. It only requires a camera to do so and that means that you can go ahead and do it right now, even with your smartphone!

photogrammetry4.png
Photogrammetry

Next step is to stitch your photos together to create a 3 dimensional mesh of the object you captured. 123D Catch, Trimensional, or Trnio are all great apps for this. The software will match all overlapping points of the images and create a 3D model.

Light-based scanning

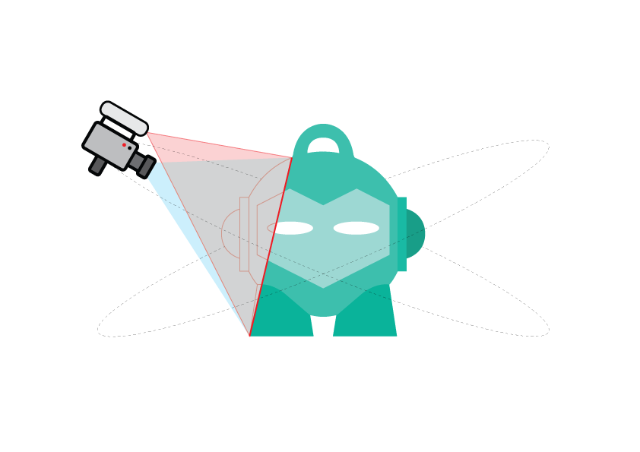
There’s two common types of light based scanners used for 3D scanning - “structured light” and “laser scanning”. Structured light scanners send patterns of light onto the object to capture. Based on the deformations of the pattern it determines the model form and creates a 3D mesh, or digital replica.

Laser scanning uses a slightly different method. It measures the angle of the reflected lasers which it can translate into coordinates of an object and therefore into a 3D mesh.
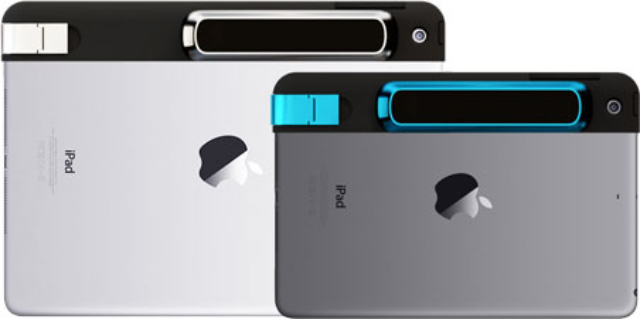
laser scanning4.png
Laser scanning

Most of the current hand-held scanners use the laser scanning technology. Some of them like Structure.io or iSense are simply a laser with a sensor that you can mount on your smartphone or iPad. While others use a small spinning platform, to place an object on and scan while it is the object that turns. This is how the Makerbot digitizer works, for example.

That’s it for now! I will continue this series and dive into different aspects of scanning. Please do leave your comments and critics so we can make this a great resource! Also tell us which topics you would like us to cover and we will.

Happy scanning!

structure 4.png

20 Likes

I really like this piece! Very informative and high quality.

Great work team!

2 Likes

Good one, Arnoldas! Looking forward to the next episodes :slight_smile:

1 Like

Nice one, @derKarsten. Think you’ve more or less covered everything in one piece. Quite an achievement!

Think there’s one aspect worth mentioning, which is the size of the object you’re scanning ( and intending to print ) as some technologies are more suitable for some sizes and some for others. For instance, laser scanning, on a turntable, is more suitable for smaller objects ( say 50mm to 200mm ), while laser scanning is usually more appropriate for larger objects, like say 300mm - 2M and maybe above. So, I have a Matter and Form turntable scanner for small objects and an ( Occipital ) Structure Sensor for scanning people and, for instance, furniture.

Since we’re specifically talking about scanning for 3D printing, I thought I’d share a technique that I’ve found useful ( if a little time-consuming! ) for smaller objects. For example, I needed to scan a Horse Chestnut ( We call it a “Conker” here in the UK - Google it and you’ll find out why. ) and produce prints at half scale. The conker was only about 5cm at its largest dimension, so it was going to be a challenge to preserve as much detail as I needed. So, I scanned the nut several times -and from various orientations - and integrated all of the point clouds together ( This is always advised for laser scanning ). Then I printed out the resulting mesh at double size in white ABS. I finished and trimmed the large print so that it was exactly as I wanted its miniature counterparts to be, then scanned that, plenty of times. The sanded white plastic was a perfect surface for scanning. This gave me a really rich mesh that I could scale down to half of the original scale. It may sound like a rather laborious method but I assure you, it’s worth it, if you want to get good results and don’t want to spend a fortune!

A couple of other tips:

Talcum powder is sometimes useful to reduce reflection. I also use rattle cans of white rubberised paint, which can be peeled off high-gloss hard surfaces after I’ve scanned them. I even used it on a dead fish I scanned for one job! OMG! I’ll never forget the smell of rubber, and 4 day-old fish! Gak!! :-/

I see you’ve used Sketchfab to illustrate the piece. If you’re into scanning, it’s well worth signing up there. For a start, they run regular scanning competitions ( 3DScanning Thursday - Just search #3DST ) and you’ll find plenty of other 3D scanning enthusiasts on their forum to share tips with. It really is the best place to share 3D content. You’re welcome to browse my stuff - Good and not so good!..

https://sketchfab.com/andylewis

Looking forward to other contribs. 3D scanning is a new technology and even faster-moving than 3D printing. I’ll be interested to learn what other hubs have found out. Hoping to meet plenty of 3D scanning enthusiasts at the 3DHubs London scanning meet up!

Cheers!

AndyL

https://matterandform.net/blog/andy-lewis-and-the-news

Pot8oSH3D

4 Likes

Great piece @derKarsten!

As @Krumbacher pointed out, scanning smaller objects might be tricky. Nevertheless there are structured light scanners developed specifically to scan vert small objects (i.e. Artec Spider). But of course they come at a price.

Looking forward to the next blogposts.

1 Like

Wow! Great feedback. Scanning-printing-scanning seems like a great idea! Not really intuitive , but a great find. I am very curious about what kind of job it was to scan a dead fish haha!! Nevertheless, I’ll be trying to cover ‘making your scans ready for 3D printing’. If you have any tips , let me know :wink:

Thanks @derKarsten. Yeah. Think there would be a “Nose offence premium” for future fishy jobs but other than the scanning it was a really fun project. More info on that project here…

https://matterandform.net/blog/andy-lewis-and-the-news

Prepping scans for printing is certainly one of the biggest challenges at the moment, depending on the scanning method, output format and workflow. Don’t think I’ve ever managed to avoid using Meshlab or Netfabb in any of my scan-and-print projects. So far, they’re the fastest workflow for me, although, of course, there’s lots of room for improvement and chargeable packages would offer more streamlined workflows.

Cheers!

AndyL