(attempt 1)
Here at 3D Hubs, we do a lot of 2D printing along side our 3D printing. Mostly to mail things out to our lovely users and community members. In an effort to make our letters and mail more ‘official’ I thought it would be a good idea to make a stamp of our logo. And I thought it would be a fun project. I’m documenting the process so anybody can easily make something similar, assuming it works.
Software Involved:
Adobe Illustrator or GIMP
Tinkercad
Slicing software of your choice
The Printer & Material:
Form1+
Clear V2 Resin
Draft Mode .1 mm resolution
The Files:
Base files are from this Thingiverse project and are also attached.
The process
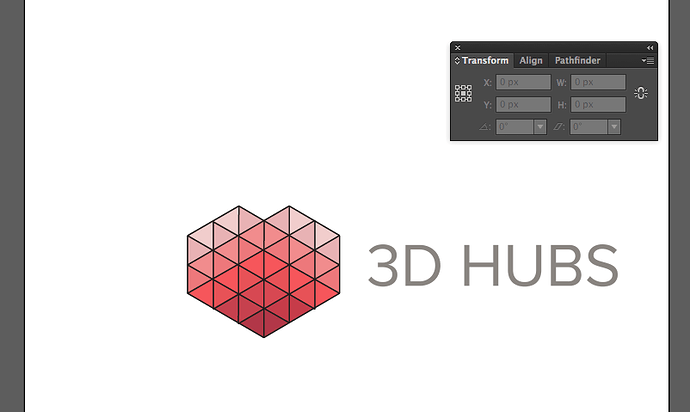
The first step is to prepare the image you want the stamp to be of. The 3D Hubs logo is perfect for a stamp because it has a lot of edges and negative spaces when you are just looking at the outline.
I took our logo into adobe illustrator (GIMP works too if you dont have illustrator) and just used the pen tool to trace our logo without any infill. After that I increased the line weight of the trace to give it some more thickness.
After completing this process, you save the file as PNG. Ultimately, you want an SVG, but for some reason Tinkercad was failing to import SVG directly saved from photoshop. When I converted the PNG to SVG at http://image.online-convert.com/convert-to-svg , everything imported fine on Tinkercad.
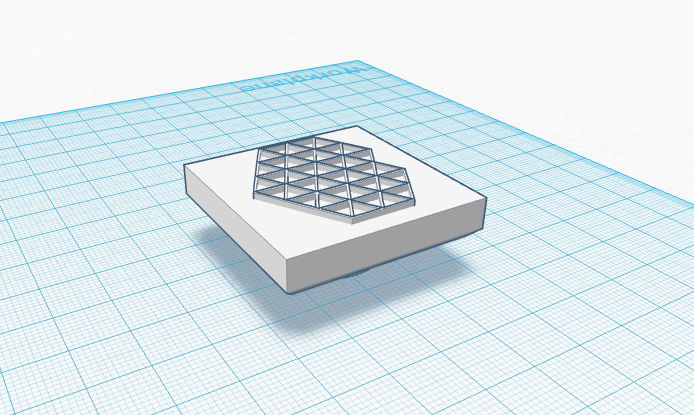
Importing the 2D SVG file on Tinkercad creates a 3D shape of your drawing. Once that imports successfully, scale it down to fight one of the premade stamp bases on the Stamp Kit Thingiverse file - http://www.thingiverse.com/thing:331890/#instructions . I chose the rectangular one. This being an experiment, I had no frame of reference on how much height to add to get the right stamp height. I went for about 3 mm for our logo.
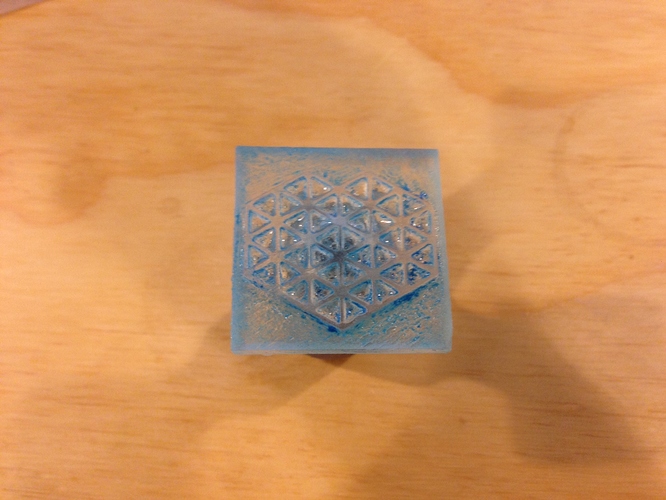
Join the drawing with the base and you’re ready to get printing. I decided to go with the Form1+. This can easily be done with any FDM Machine. I did no additional scaling in preform, but i did auto orient it and add supports.
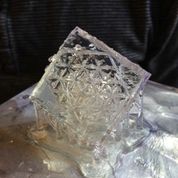
A few hours later, Success! Or so I thought. Turns out the resin material doesn’t hold ink too well. Although it does look very cool. I stumbled upon a Sugru blog post about overmolding and this seems to be the perfect solution because Sugru is essentially sillicon and can hold the ink much better. Tomorrow I’ll get a proper inkpad, print a bounding box for the sugru overmold, and let it sit overnight. Does anyone have any tips? Or experience using Sugru and 3D Printing? This has been a fun project so far, but I can use some help.
Stamp_base_40_square.stl (4.94 MB)
Stamp_handle.stl (663 KB)