Once you use it you will know what you are paying for. I could not be in business without Simplify 3D. It’s at least 10x better than slic3r in my opinion.
As I was getting started with my 2X, I found ( @45 seconds of this video) the rods were not fully engaged into the bodies.during this process, I also ‘cracked loose’ all the structural screws on the main box itself.If the box is tilted and or out of alignments during initial assembly, nothing will line up properly. My square that I use is verified @ .0004" in 8", so that’s plenty accurate. I uset the square directly on the base plate, and checked all the verticals, and sequencially tightened ( like an engine block/ head tightening process, inspecting each vertical as went along. when that is complete, then move to the gantry duties. on my marvin pics I have my first bahamut print, @ .2 res to compare.
Yeah, extra help would be appreciated, the entire gantry fell during shipping.
Rhluttrell@rocketmail.com
Sharon
25
Anybody have a source for an Aluminum Extruder Block upgrade for a Rep 2X (I need left and right)? The place on eBay where I got them for my Rep 2 seems to have gone offline. If you have a better suggestion for the 2X I would love to hear your experiences.
This is the one I had wanted (scroll down on the listing)
http://www.ebay.com/itm/111566069212
Thanks!
For the past year I’ve been sticking prints well with Kapton tape from ebay and wiping the build plate every build with denatured alcohol. I’ve tried acetone without any benefit beyond alcohol, and acetone stinks anyway. the first couple tape application were stressful but now I have fine system that works great by having two pencils at two edges that I hold taunt during the process.
wayne
27
Based on info on the excellent (but now defunct) Makerbot Operators google group, I bought the Rep2 version of this http://devilsinthedetails.ca
It supports Rep2X too, I’m happy with it, although I’ve not managed to get ninjaflex to extrude yet, need to use the alternate spring I think.
wayne
28
Personally, I think it’s awesome, and well worth it, it does have some quirks and takes time to get settings ‘dialled’ in.
Being able to manually place support material in the GUI is a great feature.
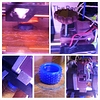
The automatic support material generation is kinda cool too; it kinds generates a concertina that can be easily removed(see attached)
The slicer is *fast*, it is multi-threaded so uses all your CPU cores.
wayne
29
Have you asked them directly? You might want to try.
wayne
30
Hi, where did you get the green panels from?
wayne
31
wayne
32
The attached guide also has some tips and nice exploded block diagrams. (I can’t find the original link, but the document is in the public domain)
Makerbot Replicator 2 Guide Public Edition.pdf (1.23 MB)
While the article says you should level the build plate, I found that the out-of-the-box method is far from accurate. To get a truly level build plate, I haven’t found anything better than an incredibly thin leveling test print ( Leveling Test Print by DamianGto - Thingiverse ) and a dial indicator rigged up on the X rails with some magnets ( Replicator Bed Level Jig by phineasjw - Thingiverse )
Print once, find the point where the print came out the best, set that as your zero on your dial indicator, and then adjust the build plate until everywhere has the same reading. Repeat the process to either verify it’s level and set to the right height, or to find out how you might need to tweak the calibration, oooooorr… discover your build plate is warped in one corner and settle for not printing on that side until you get a glass build plate.
Amen on the test print for leveling. However my thingiverse print only takes 2 minutes to print. Its set to only do hatching at corners and over each spring adjustments. Thing 80227 waste alot of material and time. Yes, I’ve found that the best leveling leaves the back left corner as an area to avoid. (or minimize with a raft)
Its the cooling personality of ABS that makes it warp. Warping can be avoided by building in a heated chamber, by using PEI (PEI bed surface - Hardware - LulzBot) or Buildtak bed liner. Kapton, glue, acetone slurry,hairspray (aqua net), blue tape, white glue mix will all work. The white glue mix can be made so strong that the parts will break the glass coming off so be careful. By using Buildtak we have found the parts become stronger by curing under stress.
Warping can be caused by long unbroken, straight lines of filament being put down in the slic3r engine and breaking up the pattern helps. Build plate heat traces cause some issues too as others have noticed that moving the part around on the plate can help. Avoid drafts and fans with ABS. Use an enclosure.
Currently I am testing and using Buildtak in a production environment. Its been the best stuff that I have used so far.
Two points:
1. The spring loaded mod is a must, but I had to go another step further for exotic filaments. This knob adjust makes it easy to apply just the right amount of force on the filament. Thingiverse - Digital Designs for Physical Objects
2. I’ve found that the NEW large rolls of PLA from MakerBot reguire ABS temps to avoid jamming. That and reduced print speed.
paul_15
37
Acrylic warps over time with heat and is impossible to keep flat. I’ve gone another way with build platform issues… 2 items solved this for me. Buildtak http://www.buildtak.com/ for the surface… I’ve not had to replace it after hundreds of hours of jobs… and an alum platform (because i upgraded to a heated platform ). Glass could do the same. I also enclosed the chamber and put an enviromental control on it for better temperature control.
Even with Buildtak you still need a heated bed right? I’ve got access to an Ultimaker 2 and a Makerbot Replicator 2. The U2 is supposed to be ABS capable, but so far it was not delivered. Buildtak would solve the adhesion and warping issues on it right? As for the Rep2, I’d love to find a cheap way to make it ABS capable.
Could you expand a bit more on what you did for the larger rolls? My school just bought a few of them, and I was the first one to test them out. My jobs, ranging from 3-5 hours, will start out great, and have even worked for hours, but always get some kind of jam before completion. It’s not the printer, as its in good condition, and has printed jobs well with other, smaller spools. However, its a 4th gen Rep2, and the set temp for PLA is already 230 C, so should I try to push up to 240 C for the larger spool? I’m already printing at sluggish speeds of 40 or 30 mm/s trying to keep the jobs good quality at low resolution.
To be honest, I barely get good results with anything I try and I’ve since been avoiding them unless the color is just too perfect to not use. My suggestion is to try and obtain some non MB PLA and see if it helps.